Table of Contents
This post focuses on how to choose and implement suitable disk and file encryption technologies, covering Windows, Mac, and Linux.
- How Disk Encryption is Attacked
- Learn the techniques used by hackers or malicious actors to compromise disk encryption.
- Understand real-world attack scenarios.
- How to Mitigate Attacks
- Gain knowledge about countermeasures to strengthen encryption systems and protect data from unauthorized access.
- Effective Encryption Implementation
- Implement encryption using industry-standard tools:
- BitLocker: Microsoft’s built-in encryption tool for Windows.
- FileVault 2: macOS’s native full-disk encryption software.
- VeraCrypt: A free, reliable, and open-source encryption program.
- **DiskCryptor (DMCrip)**: A lightweight Windows-compatible encryption alternative.
- LUKS (Linux Unified Key Setup): Popular for full-disk encryption on Linux.
- Self-encrypting Drives (SEDs): Hardware-based encryption embedded in certain hard drives.
- Implement encryption using industry-standard tools:
- Advanced Encryption Concepts
- Mandatory Key disklosure: Explore scenarios where legal systems may enforce the sharing of encryption keys.
- Plausible Deniability: Techniques to disguise or deny the existence of encrypted data.
- Nested Crypto Systems: Layering multiple encryption systems for enhanced security.
- Obfuscation Techniques: Hiding encryption patterns to confuse attackers.
- Case Studies
- Analyze real-life examples of how disk encryption has been compromised.
- Learn actionable strategies to counter similar attacks and reinforce security defenses.
Comparison of disk encryption software – Wikipedia
Disk Encryption: Understanding the Basics
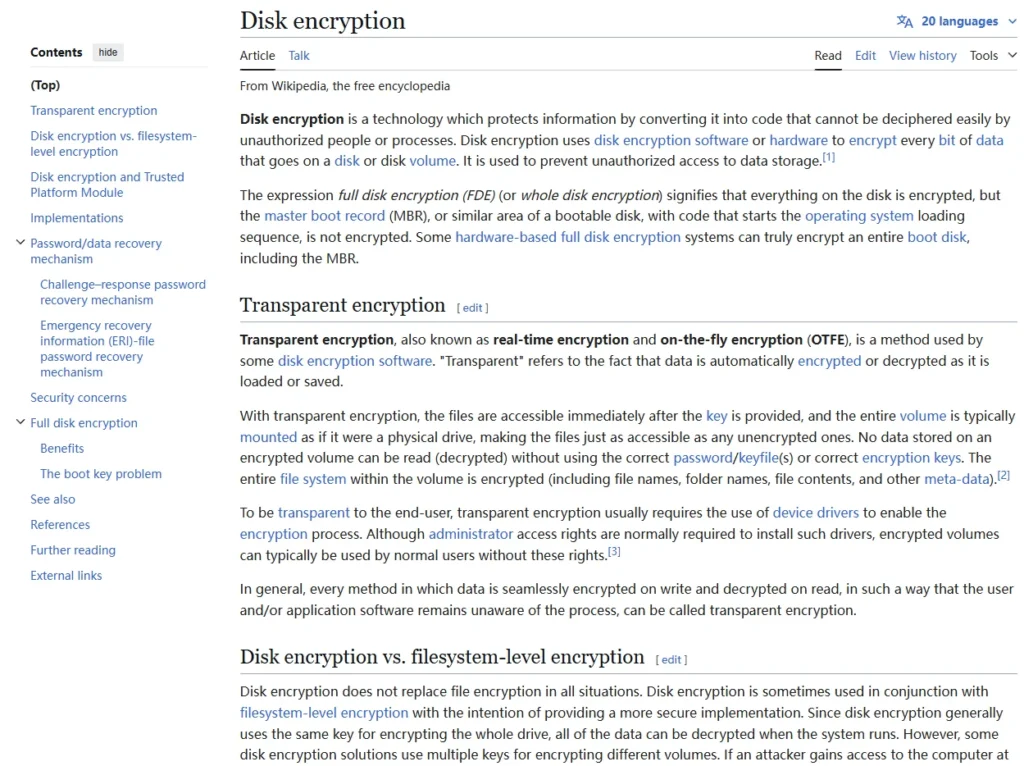
Disk encryption is a technology designed to protect data by converting it into an unreadable format through cryptography. This ensures that only authorized individuals can access the data. It involves the cryptographic protection of specific parts of a disk, such as folders, partitions, or even the entire disk, ensuring all the data written to it is automatically encrypted and decrypted on the fly.
What Can Be Encrypted?
A “disk” in the context of encryption is not limited to just internal hard drives. It can include:
- External hard drives
- USB flash drives
- SD cards
- DVDs and CDs
- Virtual storage disks (e.g., ISO images)
- Loopback devices
- Any storage medium readable as a block device or file system.
How Is disk Encryption Implemented?
- Software-Based Encryption:
- Common tools include:
- DM-Crypt and LUKS (Linux)
- VeraCrypt (multi-platform)
- TrueCrypt (legacy software)
- CipherShed
- BestCrypt
- FileVault 2 (macOS)
- BitLocker (Windows)
- Common tools include:
- Hardware-Based Encryption:
- Many modern SSDs (solid-state drives) come pre-equipped with self-encrypting drive (SED) technology, offering encryption directly through hardware.
Whole-disk Encryption vs. Partial Encryption
Whole-disk Encryption:
- Encrypts the entire operating system and all user data.
- However, boot partitions, swap partitions, or master boot records might remain unencrypted when implemented via software.
- Some hardware-based solutions provide true full-disk encryption, securing everything, including the boot process.
Partial Encryption:
- Encrypts specific parts of a disk, such as:
- A single disk partition
- A data container
- This approach only protects selected data and does not secure the entire system.
What Does disk Encryption Protect You From?
disk encryption is primarily designed to protect against physical threats. It ensures that data remains inaccessible without the proper decryption key or password. For example:
- Protection Against Physical Access:
- If your device is lost or stolen
- If your device is seized
- If your device is left unattended (e.g., at a repair shop or border crossing)
- If sent via postal services
- Mitigates Tampering Risks:
- disk encryption helps maintain the integrity of files and operating systems.
- Prevents unauthorized modifications, such as:
- Installing rootkits
- Adding keyloggers
- Injecting malware
- Enhances Privacy & Anonymity:
- Files are unreadable without the correct key or password, even if the attacker gains physical access to the device.
- Protects During Secure Disposal:
- If you need to securely diskard a storage device, encryption ensures data cannot be accessed even if the storage medium is recovered.
How to decrypt Full Disk Encryption – Passware Support
Limitations of disk Encryption
While powerful, disk encryption is not a universal solution. Here are some key limitations:
What Doesn’t It Protect Against?
- Online Threats:
- disk encryption cannot protect you from:
- Traffic interception
- SSL stripping attacks
- Browser vulnerabilities
- Malware or rootkits
- disk encryption cannot protect you from:
- Active Sessions:
- Once a system is powered on and the key/password is entered, any adversary or malware gaining access to your system can:
- Read your files.
- Steal the encryption key from memory.
- Deploy keyloggers to capture passwords.
- Once a system is powered on and the key/password is entered, any adversary or malware gaining access to your system can:
- Physical Attacks:
- Cold Boot Attacks: Encryption keys can persist in memory for a short period after a device is powered off. This makes it possible to extract the key from memory using specialized tools.
- Tampering by Adversaries: If your device falls into the hands of a well-resourced adversary (e.g., nation-state actors), they can modify your hardware or software to compromise encryption.
- Mandatory Key disklosure:
- In countries with laws requiring individuals to disklose encryption keys, encryption provides no protection against legal coercion.
- Backup Vulnerabilities:
- If encrypted data is backed up to an unencrypted location, the backup becomes vulnerable. Always encrypt your backups.
Disk encryption is an essential tool for protecting data, particularly against physical access threats. However, it must be used in conjunction with other security measures to provide comprehensive protection. Here is a summary:
- Disk Encryption Benefits:
- Secures data when a device is lost, stolen, or accessed physically.
- Prevents unauthorized tampering with files or systems.
- Maintains data privacy and, in some cases, anonymity.
- Disk Encryption Limitations:
- Offers no protection against online threats or malware.
- Vulnerabilities exist when the system is powered on and unlocked.
- Cold boot attacks and tampering by advanced adversaries may still bypass encryption.
- Best Practices:
- Always encrypt your backups.
- Use strong, unique passwords for encryption.
- Consider additional security measures, such as two-factor authentication and secure hardware.
Attacks Against Whole Disk Encryption
Whole disk encryption is a robust technology, but it is not immune to attacks. The most common approach attackers use is to exploit the weakest link in the encryption chain. Let’s break down these attacks and understand how to mitigate them.
1. Cryptographic Algorithms & Brute Force Attacks
Strength of Encryption Algorithms
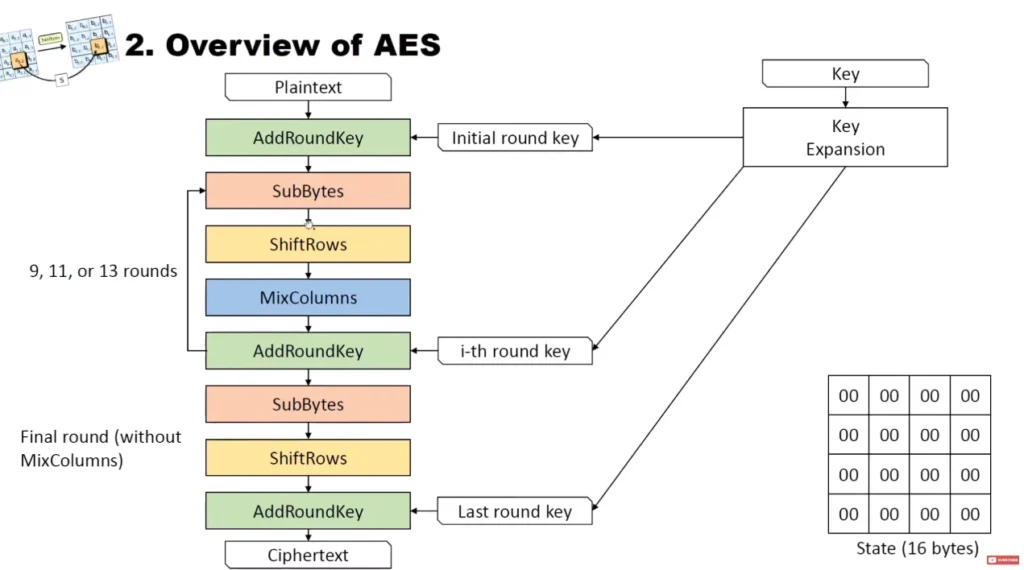
- Encryption ciphers like AES, Twofish, and Serpent are currently considered strong because no practical methods exist to break them today.
- However, encryption strength is not guaranteed forever. Future advancements, such as new mathematical techniques or quantum computing, may render current algorithms vulnerable.
Future-Proofing Encryption
- To mitigate future risks:
- Some systems allow cascading encryption algorithms (e.g., combining AES, Twofish, and Serpent). This means an attacker needs to break each algorithm individually, making the attack significantly harder.
- Key Length Matters:
- Quantum computers could theoretically halve the strength of symmetric keys. For example, a 128-bit key may only offer 64 bits of security against a quantum attack.
- Use 256-bit keys as a future-proof measure to maintain security against brute force and quantum attacks.
Key Takeaway:
- Strong passwords are essential because they generate the encryption keys. Weak passwords, no matter how strong the algorithm, can undermine security.
2. Implementation Vulnerabilities
Hardware and Software Flaws
- Encryption is difficult to implement correctly, and both hardware and software encryption systems are prone to vulnerabilities.
- The history of encryption systems has shown numerous implementation flaws:
- Poorly designed systems introduce weaknesses.
- Unless rigorously audited, it’s hard to trust a system’s implementation.
Open Source vs. Closed Source Systems
- Open Source Systems: Easier to audit due to transparency and community scrutiny.
- Closed Source Systems: Relies more on trust, with limited visibility into potential vulnerabilities.
Configuration Issues
- Some encryption systems allow configurations that weaken security. For example:
- Storing sensitive keys or data in unsafe locations (e.g., system registry, swap files, crash dumps).
- Poor configurations can make a system vulnerable even if it uses strong algorithms and passwords.
Key Takeaway:
- A poorly implemented or configured system is often the weakest link in encryption.
3. Deliberate Backdoors
- Governments and adversaries, such as NSA or GCHQ, have a history of introducing deliberate backdoors or weaknesses into cryptographic systems.
- These backdoors are often undetectable, and if they exist in the encryption system you are using, your security is compromised.
Key Takeaway:
- Be cautious of encryption systems coming from untrustworthy or questionable origins.
4. Software-Based Attacks
Poorly designed systems may expose encrypted data through:
- Crash Dumps: Sensitive information dumped into logs or files after a system crash.
- Virtual Memory and Swap Files: Encryption keys or data inadvertently stored in these areas.
- Registry Entries: Storing sensitive information in unsafe locations.
Key Takeaway:
- Even the strongest algorithms and passwords are irrelevant if sensitive data is leaked through poor software design.
5. Quantum Computing Threats
- Quantum computers are expected to significantly weaken current symmetric-key encryption. For example:
- 128-bit keys are theoretically breakable using future quantum computing.
- To maintain security, use 256-bit keys for critical systems today.
- While quantum computers are not yet advanced enough to pose an immediate threat, progress is being made:
- In 2015, NASA and Google demonstrated the world’s first operational quantum computer. While basic, this shows that quantum computing is on its way.
Key Takeaway:
- Prepare for quantum threats by choosing encryption systems with longer key lengths and advanced algorithms.
6. Unknown Errors and Compensating Controls
- Unknown implementation flaws or bugs can lead to vulnerabilities that attackers might exploit in the future.
- Compensating Controls:
- Use additional measures to reduce risk.
- Example: Never leaving your device unattended to mitigate the risk of tampering or physical attacks.
Key Takeaway:
- Plan for the unexpected by implementing secondary security measures.
Whole disk encryption provides strong protection, but it is not foolproof. The effectiveness of encryption depends on algorithm strength, implementation quality, and how it is used. Here are some best practices to safeguard against attacks:
Best Practices:
- Use 256-bit keys to future-proof your encryption.
- Choose trusted, well-audited encryption systems (preferably open source).
- Ensure proper configuration to avoid vulnerabilities from system design flaws.
- Be cautious of potential backdoors and avoid suspicious or untrustworthy encryption solutions.
- Plan for quantum computing by staying updated with advancements in post-quantum cryptography.
Security Pitfalls in Cryptography – Schneier on Security
Physical Attacks on Disk Encryption
Overview of Physical Attacks
- The NSA Ant Catalogue highlights numerous physical attacks, showcasing various threats. Many attacks circumvent encryption by directly targeting the encryption key.
- Examples of physical attack methods include:
- Hardware Key Loggers: Devices that record keyboard inputs to capture passwords.
- Retro Reflectors: Tools for secretly capturing electromagnetic signals or keystrokes.
- Firmware Rootkits: Malicious firmware that spies on users or extracts keys.
- Hidden Cameras: Small cameras observe users entering passwords.
- These attacks focus on weak links in encryption; for instance, filming someone typing a password is easier than brute-forcing it.
Mitigating Physical Attacks
- Prevent adversaries from physically accessing your device.
- Secure your device by:
- Acquiring it anonymously.
- Fully powering it off (not sleep or hibernate).
- Physically locking it away.
- Not leaving it unattended.
- Devices could be tampered with before delivery, which is why open-source hardware gains preference.
Weakness of Decryption Keys in Memory
- When a disk is decrypted, the key resides in memory for access to files. Anyone accessing the memory can extract the key.
DMA (Direct Memory Access) Attacks
How DMA Works
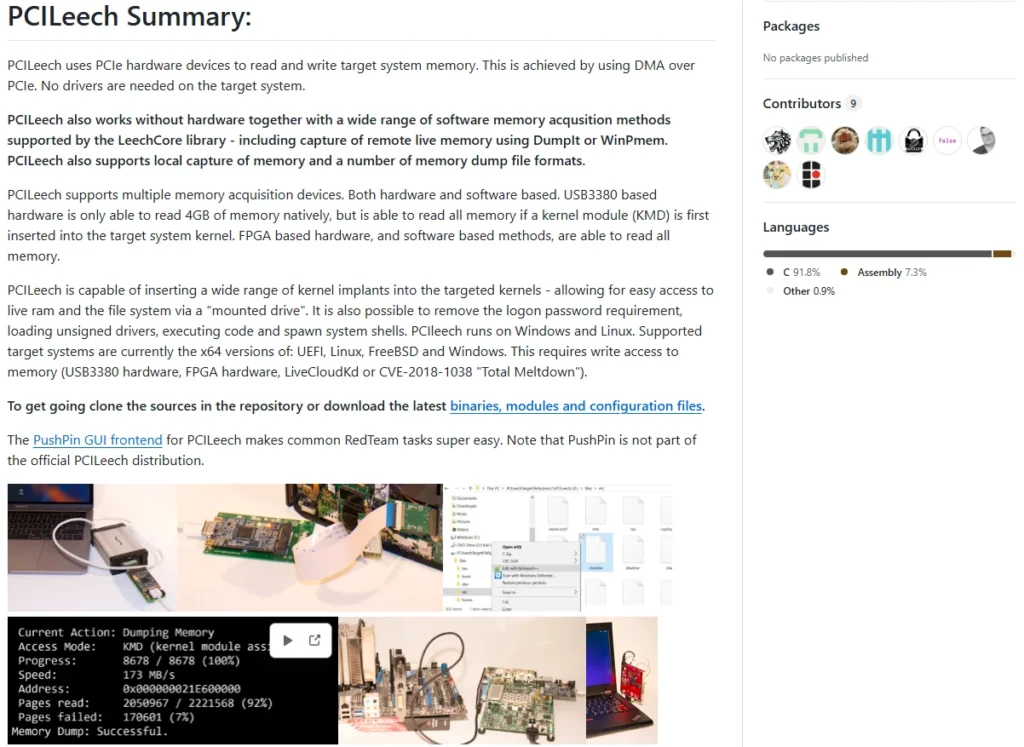
- Devices with DMA ports (e.g., PCI, FireWire, Thunderbolt) can allow attackers to inject commands or extract encryption keys.
- Open-source tools like Inception demonstrate how memory can be accessed for such attacks.
Defensive Measures
- Windows 10 introduces DMA port protection to block unauthorized memory access during startup.
- MacOS after 2012 uses VTD to block DMA attacks.
- Qubes OS provides additional protection against DMA attacks.
GitHub – ufrisk/pcileech: Direct Memory Access (DMA) Attack Software
Boot Key Problem
What is the Boot Key Problem?
- Disk encryption requires the OS to decrypt specific blocks before booting. Thus, the key must be accessible before the system asks for authentication.
Pre-Boot Authentication Solutions
- Tools like BitLocker (Windows) and LUKS (Linux) use secure environments, often combined with hardware like a Trusted Platform Module (TPM), to protect the boot process.
Cold Boot Attacks
How Cold Boot Attacks Work
- Attackers freeze RAM modules to retain memory content longer, allowing them to extract decryption keys.
- This method works on DDR1/DDR2/DDR3 RAM and potentially DDR4.
Evil Maid and Knowledgeable Evil Maid Attacks
Evil Maid Attack
- An attacker with physical access boots the system using malicious OS or disks, replacing the bootloader to capture decryption keys.
Knowledgeable Evil Maid Attack
- By altering specific encrypted disk sectors, attackers could inject malware to compromise the system upon boot.
Other Physical Attack Techniques
Additional Methods
- Replacing devices or drives with counterfeit hardware.
- Installing key loggers or firmware rootkits.
- Hot-swapping cables, conducting side-channel attacks, etc.
Issues and Attacks Related to Encrypted Containers, Volumes, and Partitions
Increased Attack Surface for Non-Whole Disk Encryption
- If you choose not to encrypt the entire disk but only encrypt a volume, partition, or create an encrypted container, the attack surface is likely to increase compared to full-disk encryption.
- This is because operating system files remain unencrypted, leaving sensitive data like logs and system settings exposed.
- Without whole disk encryption, the following data may remain vulnerable:
- Registry
- Swap/Virtual Memory
- Browser History
- Crash Dumps
- Temp Files
Risks of Partial Disk Encryption
- Without full-disk encryption, there’s a higher chance of accidently leaving private files unencrypted on the disk.
- When decommissioning a device, securely erasing data is faster and more reliable if the whole disk is encrypted.
- Partial encryption could inadvertently expose private or confidential information.
Advantages of Encrypted Containers
Flexibility and Layered Security
- Encrypted containers allow for multiple levels of security.
- For example, you can keep highly sensitive containers closed until needed, minimizing the window of attack.
- Some encryption systems for containers offer plausible deniability by leaving no obvious signatures of encryption in the container.
Combining Encrypted Containers and Full-Disk Encryption
- You can combine full-disk encryption with container encryption to enhance security.
- However, this will likely slow down system performance due to the double encryption layer.
Encryption Tools Recommendations
Container Encryption Software
- VeraCrypt: Recommended for Windows, Mac, and Linux.
- TrueCrypt: Still usable and stable but has known issues. While it won’t compromise encryption, it is considered outdated and has stopped active development.
Challenges in Choosing Encryption Software
- Disk encryption software evolves rapidly, making it difficult to provide solid, long-term recommendations.
- Frequent updates and changes in the encryption landscape can be frustrating for users.
- Whole disk encryption provides broader security by encrypting nearly all data, reducing the risk of accidental exposure.
- Container encryption offers flexibility and plausible deniability but may introduce performance trade-offs if combined with full-disk encryption.
- Choosing the right encryption tool requires careful consideration of your system’s needs and staying updated on software improvements.
Windows and Disk Encryption: Privacy Challenges and Viable Options
Windows’ Erosion of Privacy and Anonymity
- Modern versions of Windows, especially the latest ones, are increasingly incompatible with real privacy and anonymity.
- These operating systems are designed to be fully integrated with the Internet and Microsoft’s services.
- Features like Cortana and other functionalities rely on sharing user data, which fundamentally conflicts with the principles of privacy.
- The trend in Windows’ design makes achieving genuine privacy and anonymity a significant challenge.
Choosing Encryption Software Based on Threat Model
- Your choice of encryption software should depend on:
- Mitigating known attacks
- Your personal threat model
- The capabilities of your expected adversary
- These factors significantly influence which tools and technologies are most appropriate for your needs.
Current Viable Disk Encryption Tools
TrueCrypt
- Once a popular encryption tool, TrueCrypt has been abandoned as a project.
- While it has some security bugs, none of these compromise its disk encryption functionality.
- It remains a viable option, though it’s aging rapidly.
Forks of TrueCrypt
- VeraCrypt
- A prominent fork of TrueCrypt that enhances security and adds new features.
- CipherShed
- Another TrueCrypt fork offering similar functionality.
- Both options are free, open-source, and actively maintained.
Descriptor
- A free and open-source disk encryption solution designed for Windows.
Paid and Closed-Source Disk Encryption Options
- Symantec Drive Encryption
- A paid solution derived from PGP encryption technologies.
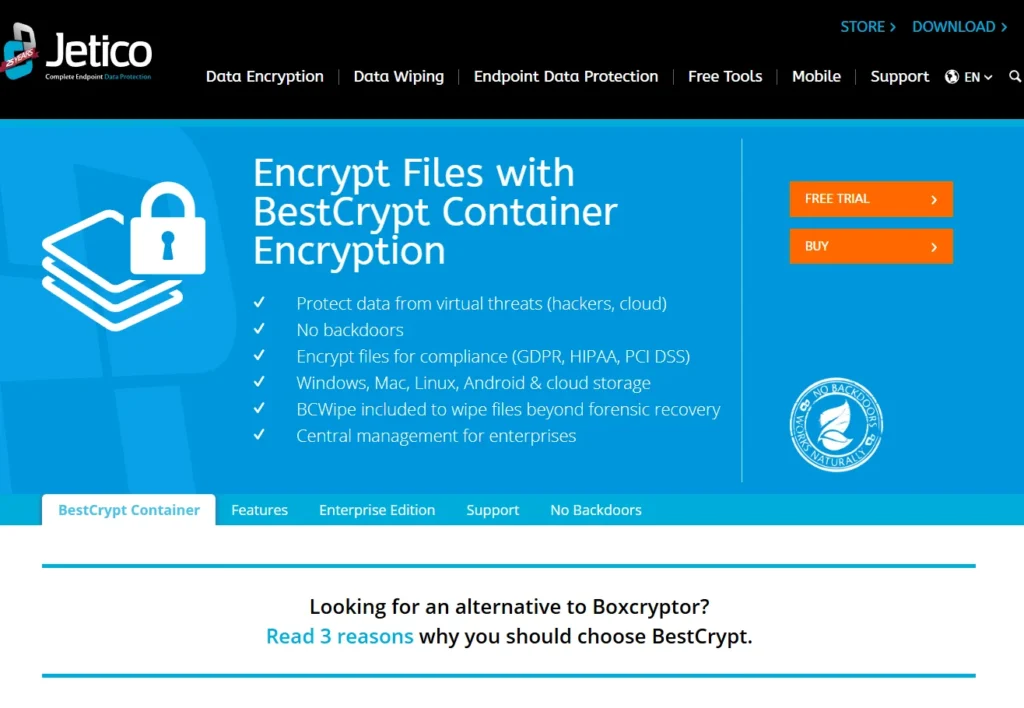
- BestCrypt
- A paid encryption tool, offering both container encryption and robust disk encryption.
- Available versions can be accessed via its official website.
- BitLocker
- A free, closed-source encryption tool that comes pre-installed with Windows.
Windows Disk Encryption and BitLocker: Overview, Pros, and Cons
Why Consider BitLocker?
- For users of Windows 7, 8, 8.1, and 10, BitLocker is often a practical choice for whole disk encryption.
- The assumption here is that if you’re using Windows, your privacy and anonymity needs are likely moderate or low.
- If you had higher privacy concerns, you probably wouldn’t be using Windows in the first place.
- BitLocker is primarily suited for users worried about device theft and not for those who face threats like nation-state adversaries.
Availability of BitLocker
- BitLocker is not available on all editions of Windows. Here’s where you can find it:
- Windows Vista & 7: Ultimate and Enterprise editions.
- Windows 8 & 8.1: Enterprise and Pro editions (not Home).
- Windows 10: Enterprise, Pro, and Education editions (not Home).
Strengths of BitLocker
1. Strong Cryptographic Security
- Supports 128-bit and 256-bit XTS-AES encryption keys, making it resistant to brute force and cryptographic algorithm attacks.
2. Defense Against Physical Attacks
- BitLocker protects against physical attacks, such as:
- DMA attacks (Direct Memory Access).
- Cold Boot attacks (retrieving encryption keys from RAM).
- Evil Maid attacks (malicious bootloader replacement).
- Integrates with TPM (Trusted Platform Module) for added hardware-level security.
3. TPM (Trusted Platform Module)
- What is TPM?
- A secure microcontroller chip on the motherboard that protects sensitive data such as encryption keys and passwords.
- Helps ensure a secure boot process by verifying the integrity of the bootloader.
- TPM Modes with BitLocker:
- TPM Only Mode: Automatically unlocks the disk, but less secure.
- TPM + User Authentication: Requires a PIN or password before boot.
- TPM + USB Key: Needs a USB key to boot, offering stronger security.
4. Multi-Factor Authentication
- Supports pre-boot authentication, such as:
- PIN or password.
- USB startup key (if supported by the BIOS).
5. Ease of Use
- BitLocker is:
- Fast and free (for supported editions).
- Simply integrated into the Windows ecosystem.
Weaknesses of BitLocker
1. Trust Issues with Microsoft
- Concerns about backdoors: Some users suspect collaboration between Microsoft and intelligence agencies like the NSA.
- While no direct proof exists, Microsoft’s history with such organizations raises suspicions.
2. Closed Source
- As a closed-source tool, BitLocker lacks the transparency of open-source alternatives like VeraCrypt.
3. Recovery Key Upload
- By default, BitLocker uploads a copy of the recovery key to Microsoft servers (if you use a Microsoft account).
- While intended to prevent users from losing data, this creates a major attack vector for adversaries.
4. Lack of Hidden Containers
- Unlike tools like VeraCrypt, BitLocker does not support hidden volumes or containers, which may be important for advanced privacy needs.
5. Questionable Removal of the Elephant Diffuser
- Microsoft removed the Elephant Diffuser, a feature that enhanced disk integrity, citing speed and compliance reasons.
- This decision was made without public announcement, raising concerns about the tool’s security.
Who Should Use BitLocker?
Recommended For:
- Users with low to moderate privacy needs, primarily concerned about:
- Device theft or loss.
- Preventing unauthorized access to their data.
Not Recommended For:
- Users who:
- Do not trust Microsoft.
- Face adversaries such as the NSA, GCHQ, or nation-state actors.
- Require container encryption or hidden volumes.
- BitLocker is a solid, user-friendly choice for basic encryption needs on Windows.
- However, it’s not suitable for users requiring high privacy or those with concerns about Microsoft’s trustworthiness.
- If you have serious concerns about privacy, consider switching to an open-source alternative like VeraCrypt or moving to Linux for better control over your data.
Setting Up BitLocker in Windows: Step-by-Step Guide
BitLocker Availability
- BitLocker is available in the following versions of Windows:
- Windows Vista & 7: Ultimate and Enterprise editions.
- Windows 8 & 8.1: Enterprise and Pro editions (not Home).
- Windows 10: Enterprise, Pro, and Education editions (not Home).
- To check if your version supports BitLocker:
- Right-click on your C drive.
- Look for the option “Turn BitLocker On”.
- If the option is not available, you may need to upgrade your Windows version.
Install BitLocker on Windows Server | Microsoft Learn
Step 1: Turning On BitLocker
- Right-click on your C drive and select “Turn BitLocker On”.
- If your system doesn’t have a TPM (Trusted Platform Module), you’ll see a message:
- “This device cannot use a TPM.”
- To bypass TPM, follow the steps below to enable BitLocker without TPM.
Step 2: Enabling BitLocker Without TPM
- Open the Local Group Policy Editor:
- Press
Windows + R, typegpedit.msc, and press Enter.
- Press
- Navigate to:
- Local Computer Policy → Administrative Templates → Windows Components →BitLocker Drive Encryption → Operating System Drives →Require Additional Authentication at Startup.
- Double-click Require Additional Authentication at Startup and:
- Select Enabled.
- Click Apply and OK.
- Go back to your C drive and click “Turn BitLocker On” again.
Step 3: Authentication Options
- If you don’t have TPM, you’ll be prompted to set an authentication method:
- Password Authentication: Recommended for most users.
- USB Key Authentication: Requires a USB stick with the startup key inserted during boot.
- If you have TPM, BitLocker will automatically store the encryption key in the TPM for seamless unlocking (not recommended for high-security needs).
Step 4: Creating a Recovery Key
- BitLocker requires you to save a Recovery Key, which can be used to unlock your drive if you forget your password.
- Options for saving the Recovery Key:
- Microsoft Account: Not ideal for privacy-conscious users, as the key is stored on Microsoft’s servers.
- File: Save the key to a secure external location (not the encrypted drive).
- Print: Print the key and store it in a safe place.
- Choose the method that best suits your security needs.
Step 5: Choosing Encryption Scope
- Encrypt Entire Drive:
- Recommended if you already have sensitive data on the drive.
- Provides the highest level of protection but takes longer.
- Encrypt Used Disk Space Only:
- Faster but less secure, suitable for new or empty drives.
Step 6: Final Steps
- Select Run a System Check to verify your settings.
- Restart your computer.
- During reboot, you may be prompted for the password (if one was set).
- Once rebooted, BitLocker will start encrypting the drive in the background.
Advanced Configuration
- You can further customize BitLocker settings through the Local Group Policy Editor:
- Enable Enhanced PINs for Startup:
- Allows the use of uppercase/lowercase letters, symbols, and numbers for the PIN.
- Change encryption strength to 256-bit AES for added security:
- Navigate to:
- Local Computer Policy → Administrative Templates → Windows Components →BitLocker Drive Encryption → Choose Drive Encryption Method and Cipher Strength.
- Enable the setting and select 256-bit encryption.
- Navigate to:
- Enable Enhanced PINs for Startup:
Managing BitLocker
- After enabling BitLocker, you can manage settings by right-clicking the drive and selecting “Manage BitLocker”. Options include:
- Change Password: Set a new password for encryption.
- Back Up Recovery Key: Save or print the recovery key again.
- Suspend Protection: Temporarily turn off encryption.
- Turn Off BitLocker: Decrypt the drive and disable BitLocker.
Combining Authentication Methods
- For enhanced security, you can combine authentication methods (e.g., TPM + PIN + USB Key):
- This requires using the
manage-bdecommand in the Command Prompt. - Example:
manage-bde -protectors -add C: -TPMAndPINAndStartupKey - Refer to the latest BitLocker documentation for detailed instructions.
- This requires using the
Encryption Status Check
- To check the encryption status of your drive:
- Open Command Prompt and run:
manage-bde -status - This will display the encryption algorithm (e.g., AES 128-bit or 256-bit) and other details.
- Open Command Prompt and run:
- Setting up BitLocker is straightforward, but it’s important to choose the right authentication and recovery key methods based on your security needs.
- For basic security against theft or loss, BitLocker is a good choice for Windows users.
- However, if you need advanced privacy or are concerned about Microsoft’s trustworthiness, consider alternatives like VeraCrypt.
VeraCrypt: A Comprehensive Alternative to BitLocker
What is VeraCrypt?
- VeraCrypt is a free, open-source disk encryption solution and a direct fork of the diskontinued TrueCrypt project.
- TrueCrypt, prior to its abandonment, was the leading disk encryption tool for Windows.
- The reasons behind its diskontinuation remain unclear, but VeraCrypt and CipherShed emerged as forks.
- VeraCrypt has since fixed many of the vulnerabilities found in TrueCrypt and introduces new features and improvements.
Advantages of VeraCrypt
1. Strong Encryption Algorithms
- Supports multiple 256-bit encryption algorithms:
- AES, Serpent, and TwoFish.
- Operates in XTS mode, which enhances security.
- Offers cascade encryption (e.g., chaining AES + TwoFish + Serpent), which can protect against vulnerabilities in single algorithms.
- Note: Cascade encryption is slower but can future-proof against potential attacks.
2. Open Source and Security Audits
- VeraCrypt, like TrueCrypt, is open-source, meaning its code can be inspected for vulnerabilities or backdoors.
- Security audits:
- TrueCrypt has undergone multiple security audits, including one by the German government.
- VeraCrypt has addressed vulnerabilities found in TrueCrypt, ensuring improved security.
3. Container and Volume Encryption
- VeraCrypt supports:
- Encrypted containers: Secure virtual file storage in a single file.
- Partition or volume encryption: Encrypt specific parts of your drive.
- Unlike BitLocker, VeraCrypt offers hidden containers and even hidden operating systems for plausible deniability.
4. Cross-Platform and Portable
- VeraCrypt works on Windows, Mac, and Linux, making it ideal for multi-OS users.
- Encrypted containers can be moved between operating systems.
- A portable version is available, allowing you to use VeraCrypt without installation.
5. Multi-Factor Authentication
- Supports advanced authentication methods, including:
- Keyfiles: Use files (e.g., an MP3) as a second authentication factor.
- Cryptographic tokens and smart cards: Compatible with PKCS#11 protocol for added security (e.g., YubiKeys).
- YubiKeys | Two-Factor Authentication for Secure Login
- password – Yubikey Two-factor Authentication Full-disk Encryption via LUKS – Ask Ubuntu
6. Secure Boot and UEFI Compatibility
- VeraCrypt works with both BIOS and UEFI systems.
- Compatible with UEFI Secure Boot, which ensures bootloader integrity and prevents tampering with boot processes.
VeraCrypt / Source Code / [3b0b59] /src/Boot/EFI/Readme.txt
Limitations of VeraCrypt
1. Performance Concerns
- Cascade encryption significantly slows down performance compared to BitLocker.
- Single-algorithm encryption (e.g., AES) is faster and suitable for most users.
2. Potential Bugs in New Code
- While VeraCrypt has fixed many TrueCrypt issues, the new codebase has introduced minor bugs.
- Stability concerns may arise, especially for users relying on it for critical data.
3. Weakness Against Physical Attacks
- VeraCrypt explicitly states that it:
- Cannot protect systems physically accessed by attackers (e.g., hardware keyloggers or modified firmware).
- Does not utilize TPM (Trusted Platform Module).
- The developers argue that TPM provides a false sense of security, as physical attacks or administrative privilege compromises render TPM ineffective.
4. Hibernate and Sleep Risks
- VeraCrypt does not block risky behaviors like using hibernate or sleep modes while encrypted disks are mounted.
- This can expose encryption keys in memory to physical attackers.
5. Licensing Issues
- VeraCrypt’s licensing inherits restrictions from TrueCrypt, which may deter contributions from the broader open-source community.
- This raises concerns about its long-term development and sustainability.
Comparing VeraCrypt to BitLocker
Why Choose VeraCrypt?
- Open Source: Transparent and auditable, unlike the closed-source BitLocker.
- Advanced Features: Offers container encryption, hidden volumes, and cascading algorithms.
- Cross-Platform: Works on Windows, Mac, and Linux.
- Plausible Deniability: Hidden containers and partitions leave no encryption signature.
Why Choose BitLocker?
- Ease of Use: Integrated into Windows and simpler for basic encryption needs.
- TPM Integration: Provides better protection against physical attacks when combined with TPM.
- Performance: Faster than VeraCrypt, especially for whole-disk encryption.
- Trust in Microsoft: Works well if you trust Microsoft and its closed-source implementation.
Best Use Cases for VeraCrypt
- Encrypting sensitive files in containers for easier portability.
- Creating hidden volumes or partitions for plausible deniability.
- Multi-OS environments where cross-platform compatibility is essential.
- Users who distrust Microsoft or closed-source software like BitLocker.
- VeraCrypt is a powerful, flexible, and open-source alternative to BitLocker, suitable for users with advanced security needs.
- However, it may not be ideal for those requiring the highest physical security or the simplicity of integrated tools like BitLocker.
- Choose VeraCrypt if you value transparency, advanced features, and cross-platform support. Otherwise, BitLocker remains a practical option for everyday encryption on Windows.
Summary of Windows Disk Encryption Tools
In addition to BitLocker and VeraCrypt, there are other disk encryption tools available for Windows. Here’s a quick summary of some popular alternatives:
1. diskryptor
- Overview:
- Free and open-source disk encryption.
- Supports whole disk encryption, but lacks support for UEFI, GPT, and secure boot.
- No support for hidden containers.
- Key Features:
- Uses strong encryption algorithms like AES, TwoFish, and Serpent.
- Allows cascading of encryption algorithms.
- Supports pre-boot authentication, with the option to place the bootloader on external media for added security.
- Limitations:
- No major security audits have been conducted, unlike TrueCrypt and VeraCrypt.
- Lacks advanced features like hidden volumes and containers.
- Stability remains uncertain, as it hasn’t been extensively tested.
2. CipherShed
- Overview:
- A fork of TrueCrypt, similar to VeraCrypt.
- Development appears to be slower compared to VeraCrypt.
- Why Consider It?
- May appeal to users who prefer an alternative team to VeraCrypt’s developers.
- Current Status:
- VeraCrypt is generally seen as the more actively maintained and viable fork.
3. BestCrypt
- Overview:
- A paid, closed-source encryption solution.
- Available in two versions: container encryption and volume encryption.
- Prices range around 50–60 euros.
- Key Features:
- Multiple hidden containers for advanced security.
- Supports UEFI-based computers and secure boot.
- Offers features like:
- Encrypted RAID support.
- Pre-boot authentication.
- Two-factor authentication with removable drives.
- Secure hibernation to mitigate risks from sleep/hibernate modes.
- Trusted Platform Module (TPM) support for unattended reboots.
- Option to boot encrypted volumes only from trusted networks.
- Why Consider It?
- Suitable for users willing to pay for advanced features and comfortable with closed-source software.
- Includes functionality not present in VeraCrypt, such as secure boot compatibility and encrypted RAID.
- Limitations:
- Being closed-source, it hasn’t been widely audited by the security community.
- Requires trust in the developers, as it lacks the transparency of open-source alternatives.
4. Symantec Drive Encryption
- Overview:
- A commercial product priced at around £52 per license.
- Opinion:
- Offers basic disk encryption but lacks the advanced features available in tools like VeraCrypt or BestCrypt.
- Not widely recommended due to cost and limited feature set.
Recommendations
- Best for Free, Open-Source Encryption:
- VeraCrypt remains the top choice for free, open-source encryption, offering strong algorithms, cross-platform support, and advanced features like hidden containers.
- Best for Advanced, Paid Features:
- BestCrypt is a suitable option if you’re willing to pay and need features like secure boot, encrypted RAID, or multiple hidden containers.
- For Simplicity and Integration:
- BitLocker is ideal if you prioritize ease of use and integration with Windows.
- For Legacy Users:
- Tools like diskryptor or CipherShed may suit users seeking alternatives but are less viable compared to popular options like VeraCrypt.
For most users, VeraCrypt is the best free and open-source disk encryption solution, offering a balance of transparency, advanced features, and cross-platform support. Paid tools like BestCrypt provide additional functionality for users with specific needs, such as secure boot or encrypted RAID.
How to Set Up and Use VeraCrypt
This guide provides step-by-step instructions to help you set up and use VeraCrypt for file encryption. The process is consistent across Windows, macOS, and Linux, as the VeraCrypt interface is almost identical on all platforms.
1. Download and Install VeraCrypt
- Visit the VeraCrypt website and navigate to the Downloads section.
- Download the version appropriate for your operating system (Windows, macOS, or Linux).
- Validate the file signature after downloading to ensure it hasn’t been tampered with.
- Install VeraCrypt on your system. The installation process is simple and consistent across all operating systems.
2. Understanding VeraCrypt Volumes
After installation, launch VeraCrypt. Here are the main options for creating encrypted volumes:
- Encrypted File Container:
- Creates a virtual encrypted disk stored in a single file.
- Recommended for storing sensitive files in a portable format.
- Encrypt a Non-System Partition or Drive:
- Encrypts partitions or external drives (e.g., USB flash drives).
- Encrypt the System Partition or Entire Drive:
- Encrypts your operating system’s partition or your entire hard drive.
- Useful for full-disk encryption to protect all data on your computer.
3. How to Create an Encrypted File Container
Follow these steps to create an encrypted file container:
Step 1: Choose Volume Type
- Click on “Create Volume” in the VeraCrypt interface.
- Select “Create an encrypted file container” and click Next.
Step 2: Standard or Hidden Volume
- Choose “Standard VeraCrypt Volume”.
- (Optional) Later, you can explore hidden volumes for added secrecy.
Step 3: Select File Location
- Choose a location for the encrypted file.
- This file will act as your secure “container”.
Step 4: Select Encryption Algorithm
- Choose an encryption algorithm (e.g., AES, TwoFish).
- You can benchmark algorithms to see which performs best on your system.
- AES is recommended for most users due to its speed and security.
Step 5: Set Volume Size
- Define the size of your encrypted container (e.g., 10MB for demo purposes or larger for actual use).
Step 6: Create a Strong Password
- Enter a secure password.
- Use a combination of uppercase, lowercase, numbers, and symbols.
- Avoid using short or simple passwords.
Step 7: Optional Keyfile for Two-Factor Authentication
- Add a keyfile for enhanced security.
- A keyfile is any file (e.g., MP3, image) that acts as a second authentication factor.
- Losing the keyfile will lock you out, so store it securely.
Step 8: Format the Volume
- Select the file system format (FAT, NTFS, etc.) based on your needs.
- Move your mouse randomly to generate entropy for stronger encryption.
- Click “Format” to create the volume.
4. Mounting and Using the Encrypted Volume
- Select the File: In VeraCrypt, browse for the encrypted file you created.
- Mount the File:
- Enter the password (and keyfile if used).
- Input the PIM (Personal Iterations Multiplier) if it was configured during setup.
- Access the Volume:
- The encrypted volume will appear as a virtual drive (e.g., Z:).
- You can now add, edit, or remove files in this secure location.
5. Creating a Hidden Volume
Hidden volumes provide an additional layer of plausible deniability. Here’s how to create one:
Step 1: Outer Volume
- Create an outer volume as usual.
- Populate it with “dummy” files to make it look genuine.
Step 2: Hidden Volume
- Inside the outer volume, create a hidden volume with its own password.
- Note: The hidden volume must be smaller than the outer volume.
- Use a different password for the hidden volume.
Step 3: Access Based on Password
- When mounting the volume, VeraCrypt will determine whether to open the outer or hidden volume based on the password entered.
6. Backup the Volume Header
- Always back up your volume header to prevent data loss if the header becomes corrupted.
- To back up the header, go to Tools > Backup Volume Header in VeraCrypt.
7. Additional Settings
- Two-Factor Authentication: Add keyfiles or cryptographic tokens (e.g., YubiKey) for enhanced security.
- PIM Settings: Adjust the number of encryption iterations for added strength (higher PIM = slower mounting but stronger security).
- Dynamic Containers: Create containers that grow in size as data is added (use with caution as it impacts performance).
8. General Recommendations
- Use a strong password and consider a keyfile for added security.
- Familiarize yourself with the difference between FAT and NTFS file systems.
- Avoid dynamic containers unless you’re unsure about the final container size.
- Always backup your volume header to prevent permanent data loss.
9. Documentation
- For more detailed guidance, consult the official VeraCrypt User Guide available on the VeraCrypt website.
- The documentation covers advanced options for system partition encryption and security tokens.
VeraCrypt is a versatile and powerful encryption tool for securing sensitive data. Whether you’re creating simple file containers or advanced hidden volumes, following these steps ensures a secure setup. Regularly review the documentation to stay updated on best practices and new features.
Overview of FileVault 2 for macOS
FileVault 2 is Apple’s built-in solution for disk encryption, available on macOS starting from OS X Lion (10.7) and later. While it comes pre-installed and is free, it has its strengths and limitations.
1. What is FileVault 2?
- FileVault 2 provides whole disk encryption (technically volume encryption) for macOS systems.
- It uses AES-XTS encryption with a 256-bit key and a 128-bit block size.
- Encryption is tied to the user’s macOS login password, simplifying the setup process.
- FileVault 2 includes pre-boot authentication, so encryption is enforced before macOS loads.
2. Advantages of FileVault 2
a. Hardware-Accelerated Encryption
- Most modern Macs leverage hardware-based encryption via AES instruction sets on Intel processors.
- This reduces the performance impact compared to software-only encryption.
- The I/O penalty is typically around 20-30%.
b. Pre-Boot Authentication
- FileVault 2 ensures authentication occurs in the EFI (Extensible Firmware Interface) stage before macOS boots.
- You can set up a firmware password to further protect against attacks like Direct Memory Access (DMA) via FireWire or Thunderbolt.
c. Apple’s Encryption Policy
- Apple has publicly stated its commitment to not introducing backdoors or weakening encryption in its products.
d. User-Friendly Interface
- FileVault 2 is easy to enable and manage, with just a few clicks in macOS System Preferences.
- No additional software or technical knowledge is required.
e. Free and Integrated
- Since it’s bundled with macOS, there are no additional costs for using FileVault 2.
3. Limitations of FileVault 2
a. Lack of Multi-Factor Authentication
- FileVault 2 only supports password-based authentication.
- Alternative methods, like keyfiles or hardware tokens, are not currently supported.
b. No Use of TPM
- Some Mac models include TPM (Trusted Platform Module) hardware, but Apple does not use it for additional encryption functionality.
c. No UEFI Secure Boot
- While more recent macOS versions support EFI, they do not implement UEFI Secure Boot, which could provide additional protections.
d. Encryption Limitations
- Boot Volumes Not Fully Encrypted: FileVault does not encrypt the boot sector, leaving it exposed to potential attacks.
- Standby Vulnerability: When a Mac is in standby mode, the encryption key is stored in EFI memory for quick resumption, making the system vulnerable to attacks.
- Solution: Use the
pmsetcommand to disable standby.
- Solution: Use the
e. No Hidden Containers
- FileVault 2 does not offer features like hidden containers or volumes, unlike VeraCrypt.
- This means it cannot provide plausible deniability.
f. Legacy Issues
- Previous versions of FileVault had serious vulnerabilities, leading to skepticism about its reliability.
- FileVault 2 marks a significant improvement, but its track record remains a concern for some users.
g. Data Residue Risk
- Encrypting an existing volume with FileVault 2 may leave fragments of sensitive data unencrypted.
- Recommendation: Use FileVault only on a new system or freshly wiped drive to avoid this issue.
h. Weak Recovery Password Entropy
- The recovery key generated by FileVault could have better randomness, making it potentially weaker against attacks.
i. Obvious Encryption
- FileVault encryption is evident to forensic investigators or adversaries, as there’s no way to hide its usage.
4. When to Use FileVault 2
FileVault 2 is a good choice for Mac users who:
- Want to protect their data in case their device is lost or stolen.
- Prefer an integrated, user-friendly encryption tool that requires minimal setup.
However, it is not the best option for:
- Protection against sophisticated adversaries or forensic attacks.
- Users who need features like hidden containers or multi-factor authentication.
5. Comparison with Other Encryption Options
- FileVault 2 is less robust than encryption tools available for Linux (e.g., LUKS) or Windows (e.g., BitLocker).
- For users needing advanced features, VeraCrypt is recommended.
- VeraCrypt provides container encryption, hidden volumes, and cross-platform compatibility.
6. Recommendations for FileVault 2 Users
- Start with a Fresh System: Avoid encrypting drives with pre-existing sensitive data to prevent residue issues.
- Disable Standby Mode: Use the terminal command
pmset -a standby 0to disable standby and remove the EFI key vulnerability. - Strong Passwords: Ensure your macOS login password is complex and unique.
- Backup Recovery Key: Safely store your recovery key in case you forget your password.
- Consider Alternatives: For advanced encryption needs, consider tools like VeraCrypt.
FileVault 2 offers a simple, integrated encryption solution for macOS users, primarily aimed at protecting data against theft or loss. While it has some notable strengths, such as hardware-based acceleration and ease of use, it lacks advanced security features found in tools like VeraCrypt or BitLocker. For users with basic security needs, FileVault 2 is sufficient, but those facing serious threats should explore more robust options.
Step-by-Step Guide to Setting Up FileVault 2 on macOS
FileVault 2 is a built-in disk encryption tool for macOS that protects your data. This guide walks you through how to set it up securely and includes additional measures to enhance its protection.
GitHub – drduh/macOS-Security-and-Privacy-Guide: Guide to securing and improving privacy on macOS
1. Initial Considerations Before Enabling FileVault 2
- Delay Immediate Encryption:
- When setting up a new Mac, avoid enabling FileVault 2 immediately after purchase.
- Wait a few days and avoid storing sensitive data during this time. This allows the PRNG (Pseudo-Random Number Generator) to collect enough entropy (random data) for better security.
- Using PRNG for Encryption:
- macOS relies on the PRNG to generate encryption keys.
- The PRNG can be manually seeded by writing to
/dev/random, but this method is technical and not user-friendly, so it’s not generally recommended.
2. Enabling FileVault 2
Method 1: Using the macOS GUI
- Open System Preferences.
- Navigate to Security & Privacy > FileVault.
- Click Unlock and authenticate to enable configuration.
- Click Turn On FileVault to start the encryption process.
Method 2: Using the Command Line
- Advanced users can enable FileVault 2 using Terminal commands.
Important Notes:
- If there are multiple user accounts on the Mac, you must enable each user separately. Each user will need to enter their password to unlock the disk.
3. Setting Up Recovery Options
When you enable FileVault 2, macOS will ask you to set up recovery options in case you lose your password:
- Avoid Storing Recovery Keys with Apple:
- Earlier versions of macOS (e.g., Mavericks) allow storing the recovery key with Apple using security questions.
- Recommendation: Avoid this option, as Apple could potentially decrypt your drive.
- Avoid Storing Recovery Keys in iCloud:
- Later macOS versions (e.g., Yosemite and higher) allow using your iCloud account to reset your password.
- Recommendation: This method is not ideal for privacy.
- Use a Local Recovery Key:
- Generate a local recovery key and store it securely (e.g., in a safe or a password manager).
- Ensure the recovery key is NOT saved on your encrypted startup disk.
4. Post-Setup Process
- After enabling FileVault 2, your Mac will reboot, and encryption will begin in the background.
- Encryption only progresses while your Mac is powered on and awake.
- To check the progress:
- Go to System Preferences > Security & Privacy > FileVault.
5. Additional Security Measures
a. Set a Firmware Password
- Boot your Mac into Recovery Mode by holding Command (⌘) + R during startup.
- Open Utilities > Firmware Password Utility.
- Set a firmware password.
- This prevents bypassing FileVault by booting from external drives or recovery partitions.
- If forgotten, resetting the firmware password requires assistance from Apple Support.
b. Avoid Sleep or Hibernate Modes
- Sleep or hibernation modes can store the encryption key in memory, making it vulnerable to attacks.
- Recommendations:
- Power off your Mac instead of using sleep mode.
- If you must use sleep, configure it to destroy the FileVault key upon entering sleep.
c. Use PMSet Command for Custom Sleep Configuration
- Open Terminal and use the following command to destroy the FileVault key on standby:
sudo pmset -a destroyfvkeyonstandby 1
- This ensures the system asks for a password when resuming from standby.
- To configure full hibernation (like on Windows):
sudo pmset -a hibernatemode 25
- The system saves the memory state to the disk and powers down, improving battery life but slowing sleep/wake times.
- Verify Changes:
- Use the command
pmset -gto check the current sleep mode and encryption settings.
- Use the command
6. Optional Tools
- Deep Sleep: A third-party tool that allows more control over sleep modes. It’s not free (~£4 in the UK) but offers additional configuration options.
- PMSet: A free, built-in macOS tool for managing sleep and power settings.
7. Limitations and Recommendations
- FileVault Key Vulnerability:
- In standby mode, the encryption key is stored in EFI memory, which can be exploited. To prevent this, use the PMSet command as described above.
- No Hidden Volumes:
- FileVault 2 does not offer hidden containers like VeraCrypt. For users needing plausible deniability, consider alternatives.
- Encryption Progress:
- Large disks may take hours or even days to encrypt. Ensure your Mac remains powered on and awake during this process.
8. Additional Resources
- Apple provides a technical white paper on FileVault 2 best practices. This document offers deeper insights into deployment and configuration.
- For detailed command references, check the PMSet man page using the following command in Terminal:
man pmset
Enabling FileVault 2 provides robust encryption for macOS users concerned about data loss or theft. While it is user-friendly and integrated into macOS, taking extra steps like setting a firmware password and configuring secure sleep modes significantly enhances its security.
For advanced encryption needs, such as hidden volumes or cross-platform compatibility, consider using tools like VeraCrypt.
A Guide to Whole Disk Encryption on Linux
Whole disk encryption is an essential step in securing your Linux system, especially for protecting your data against theft or unauthorized access. This guide explores the use of DMCrypt and LUKS (Linux Unified Key Setup), which are widely supported on Linux distributions like Debian.
1. What is Whole Disk Encryption on Linux?
- Whole Disk Encryption (WDE) encrypts the entire disk, including the operating system and user data, providing comprehensive protection.
- On Linux, DMCrypt (a kernel module) paired with LUKS is the standard for WDE.
- Unlike VeraCrypt (popular for containers and partition encryption), DMCrypt combined with LUKS supports efficient whole disk encryption.
2. Setting Up Whole Disk Encryption
During Installation (Recommended)
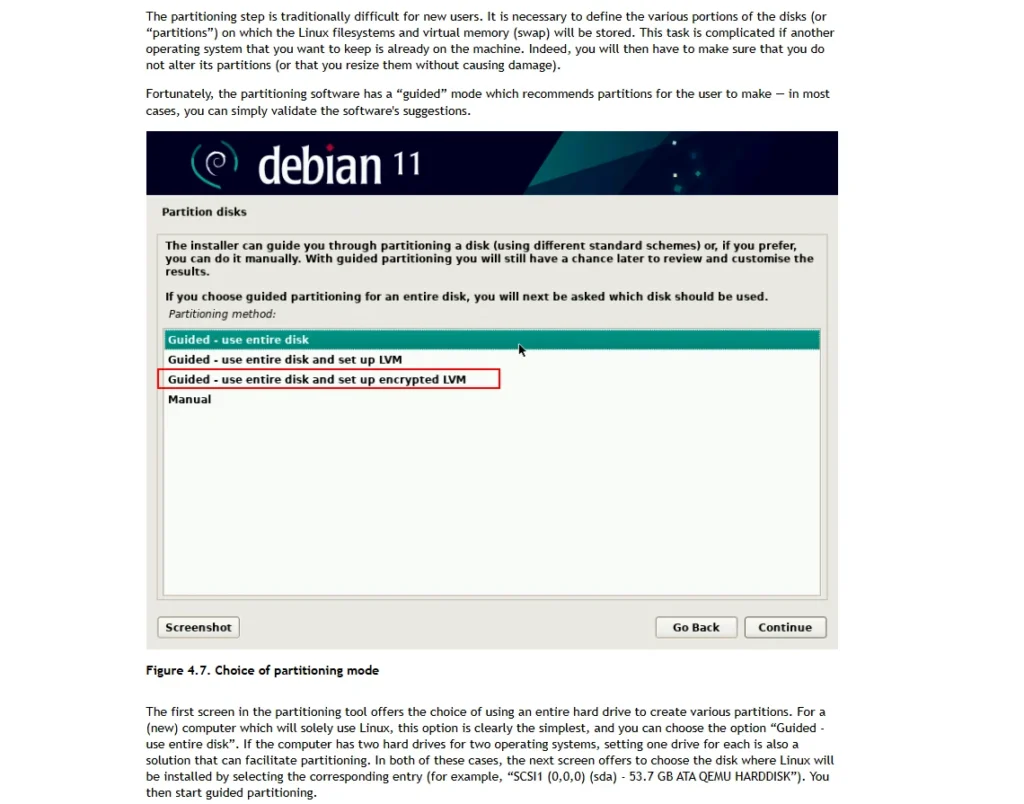
- Most Linux distributions, like Debian, provide the easiest way to enable whole disk encryption during OS installation.
- During the install process, you can select the encryption option, as shown below:
- DMCrypt is the kernel module handling encryption.
- LUKS provides key management and storage, making the encryption process user-friendly.
Default Encryption Configuration
- Debian uses the following defaults for encryption:
- Encryption algorithm: AES (Advanced Encryption Standard) with a 512-bit key.
- Mode of operation: XTS-Plain64 (a secure mode for disk encryption).
- Hash function: SHA-1 for key derivation (although SHA-1 is weak for collision resistance, it is safe for this purpose).
Post-Installation Tweaks
- While the default setup is secure for most users, advanced users can add custom configurations (detailed below).
3. Strengths of DMCrypt and LUKS
a. Strong Encryption Algorithms
- Supports a wide variety of ciphers, including:
- AES, Anubis, CAST5/6, Twofish, Serpent, Camellia, Blowfish, etc.
- This flexibility allows users to choose their preferred algorithm.
b. Open Source and Secure
- Both DMCrypt and LUKS are open source and have undergone extensive scrutiny, ensuring no backdoors or major implementation flaws.
c. Flexibility and Customization
- Highly configurable for advanced use cases:
- Multifactor Authentication (MFA): Combine a passphrase with a key file on a USB stick to reduce attack surfaces.
- Plain DMCrypt Mode: For users needing plausible deniability, it removes the LUKS header, making the encryption less identifiable to attackers.
- Pre-Boot Authentication: Ensures encryption is enforced before the operating system loads.
d. Advanced Features
- TPM Support: With third-party tools, it is possible to store encryption keys in TPM (Trusted Platform Module) or VRAM.
- Support for U2F/YubiKey: Guides are available for integrating YubiKey into the authentication process.
- Nitrokey | Secure your digital life
e. Performance
- DMCrypt and LUKS offer fast encryption due to kernel-level integration, making them ideal for most Linux systems.
4. Limitations
a. Complex Setup
- The flexibility of DMCrypt and LUKS comes at the cost of complexity:
- Requires knowledge of Linux partitions, Logical Volume Management (LVM), cryptographic principles, and command-line tools like
cryptsetup. - Documentation can be overwhelming for beginners.
- Requires knowledge of Linux partitions, Logical Volume Management (LVM), cryptographic principles, and command-line tools like
b. No Hidden Containers
- Unlike VeraCrypt, DMCrypt and LUKS do not natively support hidden containers, making plausible deniability harder to achieve.
c. Lack of Portable Functionality
- LUKS-encrypted drives are not portable across non-Linux systems without additional configuration.
d. No UEFI Secure Boot (Yet)
- While Debian supports UEFI and GPT, it currently does not support UEFI Secure Boot. Efforts are ongoing to add this feature in future releases.
e. No GUI After Installation
- After installation, all encryption management (e.g., unlocking, modifying keys) must be done via the command-line tool
cryptsetup, which can be intimidating for non-technical users.
5. Advanced Configuration Options
a. Multifactor Authentication
- Combine a passphrase with a key file stored on a USB to enhance security.
- This setup reduces the attack surface and is effective against unauthorized physical access.
b. Plausible Deniability
- Use DMCrypt in plain mode to remove the LUKS header, making it difficult to detect the drive is encrypted.
c. Encrypting the Bootloader
- If you are using GRUB, it is possible to encrypt the bootloader itself, reducing the attack surface during the pre-boot stage.
d. TPM Integration
- Some third-party modules allow storing LUKS keys in TPM (Trusted Platform Module), adding an extra layer of hardware-based security.
6. Who Should Use DMCrypt and LUKS?
DMCrypt and LUKS are ideal for Linux users who:
- Need robust security against data theft or loss.
- Have the technical expertise to configure and maintain the encryption setup.
- Require flexibility and advanced features like MFA, pre-boot authentication, or integration with hardware tokens (e.g., YubiKey).
7. Recommendations
- Beginner-Friendly Setup:
- Use the default installation method provided by your Linux distribution.
- Avoid complex configurations unless you have the necessary technical knowledge.
- Advanced Users:
- Explore options like multifactor authentication or plain DMCrypt mode for enhanced security.
- Consider documentation, such as
man cryptsetupor online Linux forums, to deepen your understanding of DMCrypt and LUKS.
- Regular Backups:
- Always keep backups of important data and LUKS recovery keys in a safe location.
DMCrypt and LUKS are powerful tools for whole disk encryption on Linux, offering flexibility, strong security, and performance. While the default setup is sufficient for most users, advanced users can customize it to meet specific security needs. However, the complexity of configuration makes it less accessible for beginners.
For casual users or those requiring cross-platform compatibility, solutions like VeraCrypt may be more suitable.
Setting Up DMCrypt and LUKS for Whole Disk Encryption on Linux
DMCrypt and LUKS (Linux Unified Key Setup) provide robust and flexible tools for whole disk encryption on Linux. This guide explains how to set up encryption during installation, manage encrypted devices after installation, and explore advanced options.
1. Whole Disk Encryption During Installation
Supported Distributions
- Linux distributions like Debian, Kali Linux, and Ubuntu have similar options for enabling whole disk encryption during the installation process.
Installation Steps
- During the install process, select:
- Guided – Use Entire Disk and Set Up Encrypted LVM.
- This option automatically configures LVM (Logical Volume Management) with encryption using DMCrypt and LUKS.
- The default encryption settings in Debian are:
- Cipher: AES (Advanced Encryption Standard) with a 512-bit key.
- Mode: XTS-Plain64 (secure and efficient for disk encryption).
Recommendation: The default configuration is secure for most users and provides future-proofing with AES-512.
2. Managing Encrypted Devices with Cryptsetup
After installation, you can use the cryptsetup command-line tool to manage encrypted devices. This tool supports:
- LUKS volumes.
- Plain DMCrypt volumes.
- Loop-AES and TrueCrypt/Veracrypt formats.
2.1 Running a Cryptsetup Benchmark
- Run a benchmark to test the performance of various encryption algorithms:
sudo cryptsetup benchmark
Results will show the speed of algorithms like AES and SHA-1 with key stretching.
2.2 Identifying Encrypted Partitions
- Use
lsblkto list block devices:lsblk- Encrypted partitions are typically labeled as
cryptdevices (e.g.,sda5).
- Encrypted partitions are typically labeled as
2.3 Viewing LUKS Details
- To inspect a LUKS-encrypted partition, use:
sudo cryptsetup luksDump /dev/sda5- This displays encryption details, such as the cipher, key size, and active password slots.
3. Managing LUKS Keys
You can manage multiple passphrases for a disk. LUKS supports up to 8 password slots.
3.1 Adding a New Passphrase
- Add an additional passphrase:
sudo cryptsetup luksAddKey /dev/sda5- Enter an existing passphrase first, then create the new one.
3.2 Removing a Passphrase
- Remove a passphrase:
sudo cryptsetup luksRemoveKey /dev/sda5- Enter the passphrase you wish to remove.
4. Backing Up the LUKS Header
- Backing up the LUKS header is crucial. If the header becomes corrupted, you cannot decrypt the disk.
- Backup the header:
sudo cryptsetup luksHeaderBackup /dev/sda5 --header-backup-file luks-header-backup.img - Restore the header (if needed):
sudo cryptsetup luksHeaderRestore /dev/sda5 --header-backup-file luks-header-backup.img
- Backup the header:
5. GUI Tools for Encryption Management
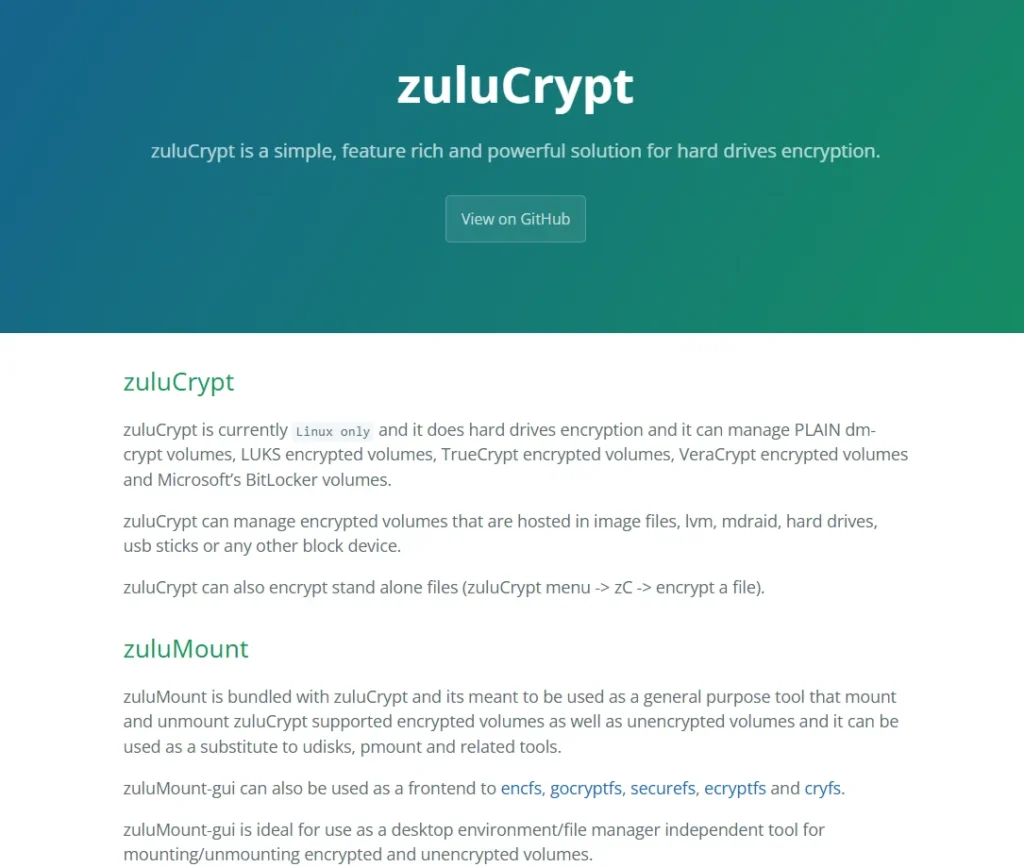
If you prefer a graphical interface, tools like ZuluCrypt are available:
- ZuluCrypt:
- A GUI tool for managing LUKS, plain DMCrypt, TrueCrypt, and Veracrypt volumes.
- Download from the official site: ZuluCrypt Official Page.
- Veracrypt:
- Veracrypt can also be used for encrypted containers and partitions. It provides a user-friendly GUI and is cross-platform.
6. Creating Encrypted Containers or Volumes
- Use
cryptsetupto create encrypted containers, partitions, or volumes:sudo cryptsetup luksFormat /dev/sdaX- Replace
/dev/sdaXwith the desired partition or volume.
- Replace
- Unlock and mount the encrypted volume:
sudo cryptsetup luksOpen /dev/sdaX my_encrypted_volume sudo mount /dev/mapper/my_encrypted_volume /mnt
7. Advanced Resources
For advanced configurations, refer to:
- Arch Linux Wiki: Comprehensive guides on DMCrypt, LUKS, and full disk encryption.
- Helpful Pages:
- Guides on disk encryption, LUKS headers, and more.
8. Things to Keep in Mind
- Backup is Crucial:
- Always back up the LUKS header and recovery keys in a safe location.
- Be Careful with Passphrase Management:
- Deleting passphrases without proper caution may result in being locked out of your data.
- Use GUI Tools for Simplicity:
- If cryptsetup feels too technical, consider ZuluCrypt or Veracrypt for easier management.
- Future Enhancements:
- The next step involves making your encryption setup even more secure, such as integrating multifactor authentication or securing boot processes.
Setting up DMCrypt and LUKS during installation is straightforward and provides robust encryption for your Linux system. With tools like cryptsetup and ZuluCrypt, you can manage encrypted devices efficiently. Always focus on backing up your keys and understanding the tools to avoid data loss.
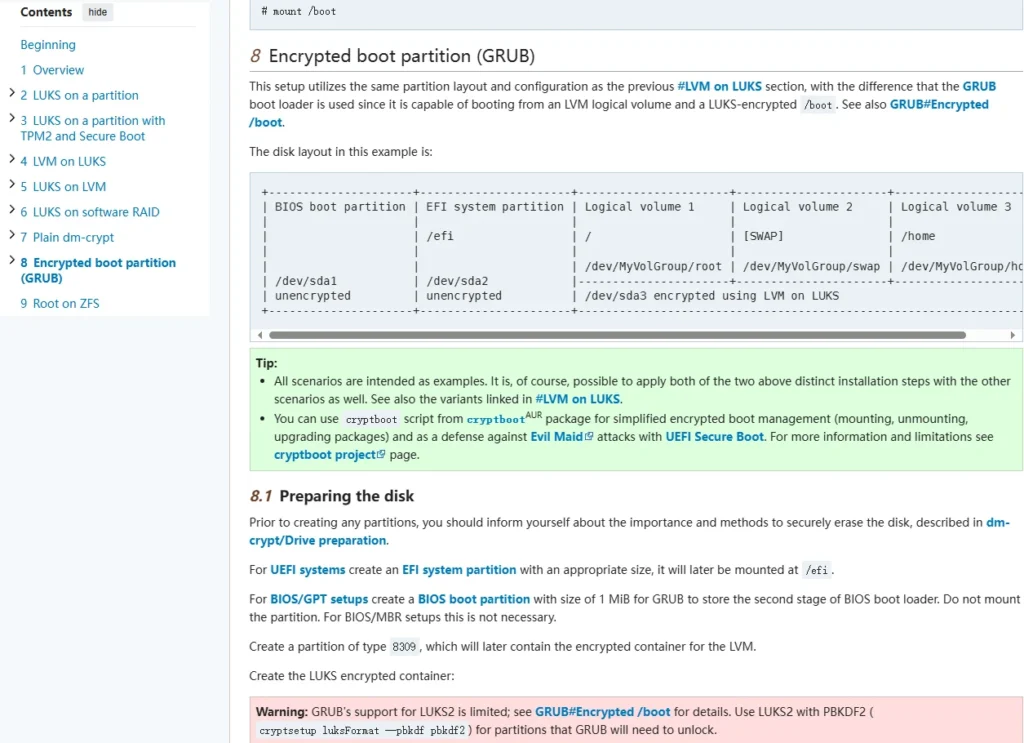
Encrypting the GRUB Bootloader on Linux
Encrypting the GRUB bootloader is an advanced measure to reduce the attack surface of your Linux system. It helps protect against physical attacks by encrypting GRUB Stage 2 and the kernel RAM disk. This guide walks you through the process, specifically on Debian-based distributions, but the steps should work on most Linux distributions.
1. Why Encrypt the GRUB Bootloader?
- GRUB (GRand Unified Bootloader) is the default bootloader in most Linux distributions.
- Encrypting the GRUB bootloader:
- Secures the boot process by requiring authentication before loading the kernel.
- Reduces the attack surface against physical tampering.
2. Prerequisites
- Backup Your System: Before proceeding, create a backup, or test this process in a virtual machine.
- Encrypted LVM Setup: These steps assume you already have an encrypted LVM configured during installation.
3. Steps to Encrypt the GRUB Bootloader
Step 1: Back Up the Boot Partition
- Copy the contents of the
/bootpartition to a temporary location:sudo cp -a /boot /mnt/boot - Verify the copied files with a difference check:
diff -r /boot /mnt/boot - Ensure there are no differences between the original and the copied files.
Step 2: Prevent /boot from Mounting
- Edit the
/etc/fstabfile to stop the system from automatically mounting/boot:sudo nano /etc/fstab - Locate the line for
/bootand remove or comment it out (add#at the start of the line). - Save the file and exit.
Step 3: Backup and Update GRUB Configuration
- Back up the current GRUB configuration:
sudo cp /etc/default/grub /etc/default/grub.bak - Enable GRUB encryption by adding the following line to
/etc/default/grub:GRUB_ENABLE_CRYPTODISK=y - Generate a new GRUB configuration:
sudo update-grub
Step 4: Reinstall GRUB with Encryption
- Reinstall the GRUB bootloader to the disk:
sudo grub-install /dev/sda- Replace
/dev/sdawith the appropriate disk name for your system.
- Replace
- Ensure no errors are displayed during the installation.
Step 5: Test the Encrypted Bootloader
- Reboot your system:
sudo reboot - During boot, you should now be prompted for the master password (same as your encrypted disk password).
4. Advanced Security Options
Option 1: Add Multifactor Authentication
- Use a YubiKey for multifactor authentication with GRUB encryption.
- A GitHub package exists for integrating YubiKey with GRUB. Instructions can be found in the repository.
Option 2: Move the Boot Partition to a USB Drive
- For additional physical security, move the boot partition to a USB drive:
- Copy the
/bootcontents to the USB drive. - Update the GRUB configuration to point to the USB.
- Keep the USB drive secure and use it only during boot.
- Copy the
- Benefit: Without the USB, the system cannot boot, mitigating certain attacks.
5. Limitations and Considerations
- Physical Access Risks:
- Even with an encrypted bootloader, an attacker with physical access can tamper with the hardware (e.g., install a keylogger).
- Encrypting the bootloader and moving the boot partition to a USB are best-effort measures.
- Complexity:
- Advanced configurations, such as multifactor authentication or USB-based boot partitions, require careful setup and maintenance.
Encrypting the GRUB bootloader is a strong step to enhance the security of your Linux system, especially against physical attacks. Combining this with practices like multifactor authentication or external boot partitions can further strengthen your defenses. However, remember that physical access by an attacker remains a significant risk, and no solution is entirely foolproof.
Data-at-rest encryption – ArchWiki
Understanding Self-Encrypting Drives (SEDs)
Self-encrypting drives (SEDs) are a type of hardware-based encryption technology found in many modern SSDs (Solid State Drives). While they offer convenience and performance, there are critical considerations regarding their reliability and security. This guide explores how SEDs work, their limitations, and recommendations for secure data encryption.
1. What Are Self-Encrypting Drives (SEDs)?
- Definition: SEDs are storage drives with built-in hardware that performs full-disk encryption.
- Encryption Algorithm: Most SEDs use AES (Advanced Encryption Standard) with either:
- 128-bit or 256-bit encryption keys.
- Encryption Process:
- When the SSD is first initialized, the controller generates a random encryption key.
- This key is securely stored in a hidden location on the SSD.
- All data written to the drive is encrypted using this key, and data reads are decrypted in real-time.
2. Benefits and Limitations of SEDs
2.1 Benefits
- Performance: Hardware-based encryption is faster than software-based encryption since it is handled directly by the SSD controller.
- Transparency: The encryption and decryption process is invisible to the user, requiring no additional software.
2.2 Limitations
- No Authentication, No Security:
- If the SED does not require a password or authentication to decrypt the drive, the encryption is effectively useless.
- The encryption only secures data between the SSD controller and the physical storage, offering no protection if the drive is stolen.
- Implementation Vulnerabilities:
- Past vulnerabilities in SED firmware have shown that some drives can be bypassed, making encryption ineffective.
- Examples include weak cryptographic implementations or hidden backdoors.
- Lack of Auditability:
- The encryption process is fully handled by the SSD controller, and users cannot verify how the encryption is applied.
- Unlike software-based encryption, there is no way to audit or validate the encryption mechanism.
3. Can You Rely on SEDs for Security?
While SEDs offer performance and convenience, they may not be reliable for security-critical applications due to:
- Hidden Backdoors: Without transparency, it is impossible to verify if manufacturers have implemented backdoors.
- Limited User Control: Users do not have direct control over the encryption keys or algorithms.
- Firmware Risks: Vulnerabilities in the SSD firmware can compromise the encryption.
4. Recommendation: Combine SEDs with Software-Based Encryption
For robust security, it is recommended to combine SEDs with software-based encryption:
- Why Use Both?
- SEDs provide hardware acceleration for encryption operations, improving performance.
- Software encryption allows for user control, transparency, and auditability.
4.1 Tools for Software-Based Encryption
- Linux Full-Disk Encryption:
- Use
DMCryptandLUKSto encrypt the entire disk.
- Use
- Cross-Platform Tools:
- Veracrypt: A user-friendly tool for encrypting containers, partitions, and disks.
- Windows BitLocker:
- For Windows users, BitLocker provides software encryption, with optional integration of SED hardware acceleration.
4.2 Why Software Encryption Is Critical
- Auditability:
- Software encryption allows users and security researchers to inspect the implementation.
- Redundancy:
- Even if the SED’s hardware encryption is compromised, software encryption provides an additional layer of protection.
Self-encrypting drives (SEDs) are a convenient solution for hardware-based encryption, but they come with limitations. Relying solely on SEDs for critical security applications is not advisable due to potential implementation vulnerabilities and lack of transparency. Instead:
- Use SEDs alongside software-based encryption for a more robust and auditable encryption strategy.
- Prioritize tools that offer user control and transparency if your security, privacy, and anonymity are important to you.
Defending Against Disk Encryption Attacks
Disk encryption is a critical tool for protecting data when adversaries gain physical access to your device. However, implementing it effectively and securely requires balancing usability and security based on your personal threat model. This guide provides practical steps and advice to mitigate risks associated with disk encryption attacks.
1. Purpose of Disk Encryption
- What It Does: Disk encryption is specifically designed to protect your data when attackers physically access your device.
- What It Doesn’t Do: It cannot protect against attacks after an attacker has tampered with the device and you continue to use it.
2. Key Mitigations to Consider
2.1 Prevent Physical Access
- Secure Storage: Keep your device in a physically secure location, such as a safe.
- Tamper Detection:
- Place a barely noticeable object (e.g., a hair) on the device and check if it moves.
- Use clear nail varnish to seal screws and assess tampering if the seal is broken.
- Do Not Use Suspicious Devices: If you suspect tampering, avoid entering any authentication information or using sensitive volumes.
2.2 General Device Security
- Avoid Leaving Devices Unattended:
- Lock the screen or power down the device, even when stepping away briefly.
- Disable DMA Ports:
- Disable ports like PCI, Thunderbolt, and Firewire in the BIOS to prevent Direct Memory Access (DMA) attacks.
2.3 Disk Encryption Best Practices
- Use Full-Disk Encryption (FDE):
- Encrypt the entire disk, including the operating system and swap files, to minimize the attack surface.
- Partition Encryption:
- Use separate encryption keys for system and data partitions for added security.
- Pre-Boot Authentication:
- Require authentication (e.g., a password) before the operating system boots.
- Multi-Factor Authentication:
- Use tokens or hardware keys for enhanced security during the boot process.
3. Mitigating Specific Attack Scenarios
3.1 Cold Boot Attacks
- What Is a Cold Boot Attack?:
- This attack involves extracting encryption keys from the system memory after the device is powered off or rebooted.
- Mitigations:
- Use tools like Tresor, which store encryption keys in CPU registers instead of RAM.
- Physically secure memory modules (e.g., glue memory to the board or tape the device shut) to make removal difficult.
- Enable Power-On Self-Test (POST) in the BIOS to override RAM and reduce residual data.
3.2 Sensitive Data Handling
- Encrypt First:
- Do not store sensitive data on a device until it is fully encrypted. Traces of unencrypted data may remain even after encryption.
- Avoid SSDs for Sensitive Data:
- SSDs use TRIM and wear leveling, which can expose sensitive data. Prefer mechanical drives when high security is needed.
3.3 Memory and Swap File Risks
- Disable Memory Dumps:
- Prevent operating systems from saving memory dumps, as these may contain encryption keys or sensitive data.
- In Windows, disable hibernation and securely delete the
hiberfil.sysfile.
- Encrypt Swap Files:
- Use tools like LUKS or eCryptfs on Linux to encrypt swap or virtual memory files.
4. Implementation Recommendations
4.1 Secure Boot
- Enable Secure Boot: Ensure only trusted software can load during startup.
- Use TPM (Trusted Platform Module): TPM enhances security by securely storing encryption keys.
4.2 External Bootloaders
- Move Bootloaders to USB:
- Place the bootloader on an external USB drive for better physical separation and control.
4.3 Software and Documentation
- Refer to Trusted Guidance:
- Even if you don’t use Veracrypt, its documentation (based on TrueCrypt) provides valuable insights and precautions for disk encryption.
- Defending against disk encryption attacks involves layered security. Use multiple mechanisms, such as full-disk encryption, pre-boot authentication, and tamper detection.
- Balance security with usability based on your threat model. If your adversary can physically access the device frequently, take extreme precautions like disabling DMA, using mechanical drives, and avoiding hibernation.
- Future topics include advanced techniques like nested cryptosystems and data obfuscation for additional protection.
File Encryption: Tools and Recommendations
In addition to whole disk encryption, partition encryption, and container encryption, encrypting individual files or archives is another effective way to secure your data. This guide explores popular tools for encrypting files across different operating systems and highlights their key features.
1. Why Encrypt Individual Files?
- Provides granular control by encrypting only the files you want to secure.
- Ideal for sharing sensitive files with others securely.
- Complements full-disk or partition encryption for specific use cases.
2. Recommended Tools for File Encryption
2.1 PZIP
- Supported Platforms: Windows, Linux, BSD.
- Features:
- Free and open-source.
- Focused on security, with support for multiple encryption standards.
- Offers two-factor authentication with a password and key file.
- Use Case: Encrypts compressed archives for secure storage or sharing.
2.2 7-Zip
- Supported Platforms: Windows, Linux.
- Features:
- Uses AES-256 encryption.
- Simple and widely used compression tool with encryption capabilities.
- Use Case: Encrypting ZIP archives with strong security.
2.3 ARC
- Supported Platforms: Windows, Linux.
- Features:
- Supports multiple encryption algorithms, including AES-256, Blowfish, and Serpent.
- Use Case: Offers flexibility in encryption methods for compressed files.
3. Using File Encryption Tools on Different Operating Systems
3.1 Linux
- Tool Installation:
- PZIP does not have a repository. Download
.debor.rpmfiles based on your distribution. - Portable versions are available to avoid dependency issues.
- PZIP does not have a repository. Download
- Desktop Environments:
- GTK versions for GNOME.
- QT versions for KDE.
- Interface: Standard archive management interface similar to WinZip or WinRAR.
3.2 MacOS
- KEKA:
- Features:
- Free compression and encryption tool (donations suggested).
- Limited GUI but supports many formats.
- Default encryption: AES-256.
- Usage:
- Select files, choose encryption, set a password, and compress.
- To decrypt, simply enter the password when prompted.
- Features:
3.3 Cross-Platform
- AES Crypt:
- Supported Platforms: Windows, Mac, Linux, iOS, Android, PHP, Java, etc.
- Features:
- File-level AES encryption.
- Requires the recipient to also use AES Crypt to decrypt.
- Supports command-line operations for automation.
- Use Case: Securely sharing encrypted files across multiple platforms.
- GPG (GNU Privacy Guard):
- Supported Platforms: Windows, Mac, Linux.
- Features:
- Public-private key encryption. Encrypt files for specific recipients using their public key.
- Simplifies secure key sharing.
- Use Case: Encrypt files for email or secure distribution.
- Tip: Refer to the “Email Security” section for more details on GPG usage.
4. How to Encrypt Files with These Tools
With KEKA (MacOS):

- Select the file(s) to encrypt.
- Choose the compression format (e.g., ZIP).
- Set a password for AES-256 encryption.
- Drag the file into KEKA to compress and encrypt.
- To decrypt, double-click the encrypted file and enter the password.
With AES Crypt (Cross-Platform):
- Install the tool on your operating system.
- Right-click the file, select “AES Crypt,” and enter a password.
- Provide the recipient with the encrypted file and the password or key.
- Use the command-line interface for batch operations if needed.
With GPG:
- Import the recipient’s public key.
- Encrypt the file using their public key:
gpg --output encrypted_file.gpg --encrypt --recipient recipient_key file.txt - The recipient can decrypt the file using their private key.
5. Encryption Standards
- AES-256: Widely used and highly secure encryption standard.
- Other Algorithms: Tools like ARC support additional algorithms (e.g., Blowfish, Serpent) for flexibility.
Encrypting individual files or archives is a practical way to secure sensitive data, especially when sharing it with others. Tools like PZIP, 7-Zip, and KEKA offer robust encryption features, while AES Crypt and GPG provide additional flexibility for cross-platform use cases.
Mandatory Key disklosure Laws and Plausible Deniability in Encryption
Encryption is a powerful tool to protect sensitive data, but mandatory key disklosure laws in some countries may require individuals to hand over their encryption keys to law enforcement during criminal investigations. This guide covers the implications of such laws and explores defenses like plausible deniability and related encryption techniques.
1. What Are Mandatory Key disklosure Laws?
- Definition: Laws that compel individuals to disklose encryption keys or passwords to authorities.
- Global Variations: Implementation and enforcement differ by country:
- UK: The Regulation of Investigatory Powers Act (RIPA) mandates disklosure with a court order. Non-compliance can result in up to 2 years in prison.
- India: Similar laws exist with strict enforcement.
- US: The Fifth Amendment offers some protection against self-incrimination, but legal interpretations vary, especially regarding biometrics like fingerprints.
- Border Crossings: Rules differ at international borders, often providing authorities more power to demand decryption keys.
2. Defenses Against Mandatory Key disklosure Laws
2.1 Plausible Deniability
- Definition: Encrypting data in a way that makes it impossible for an adversary to prove sensitive data exists.
- Examples:
- Hidden Volumes: Tools like Veracrypt allow for one password to unlock a visible, benign volume and another to unlock a hidden, sensitive volume.
- Steganography: Hiding encrypted data within ordinary files, such as images, making the data’s existence undetectable.
- Limitations:
- Requires careful management to avoid leaving traces (e.g., outdated registry entries or long-inactive hidden volumes).
2.2 Encryption Without Signatures
- Some encryption methods leave no identifiable markers, making it harder for adversaries to detect encrypted data:
- Plain DM-Crypt: Appears as unformatted partitions without encryption signatures.
- Veracrypt & BestCrypt Partitions: Similarly appear as random, unformatted data.
- Challenge: Justifying the existence of random data may require plausible explanations (e.g., a recently wiped partition).
3. Techniques for Plausible Deniability
3.1 Hidden Volumes
- How It Works:
- Create a visible container with non-sensitive data.
- Inside this container, create a hidden volume accessible only with a second password.
- Supported Tools:
- Veracrypt: Supports one hidden volume.
- BestCrypt: Can support multiple hidden volumes.
3.2 Steganography
- What It Does: Hides encrypted data within ordinary files (e.g., images, videos).
- Tool Example: OpenPuff allows embedding sensitive information into carrier files, making the data invisible to adversaries.
4. Risks and Ethical Considerations
4.1 Risks of Using Plausible Deniability
- Coercion and Physical Threats:
- In situations involving torture or coercion (e.g., “rubber hose cryptanalysis”), plausible deniability may fail as adversaries assume hidden data exists until proven otherwise.
- Legal and Ethical Dilemmas:
- Lying under oath about the existence of hidden data can be worse than refusing to disklose outright.
- Straightforward non-compliance may be a more ethical and strategic response in certain cases.
- Totalitarian Regimes:
- In oppressive states, plausible deniability is often ineffective as individuals may be presumed guilty until proven innocent.
4.2 When Plausible Deniability Works
- Time Advantage: Delaying key disklosure can provide time to make strategic decisions or distance oneself from sensitive data.
- In Just Societies:
- Plausible deniability can help comply with key disklosure laws without revealing sensitive information.
- Maintains privacy while avoiding penalties for non-compliance.
5. Practical Advice
- Choose the Right Tools:
- Use encryption methods like Veracrypt or BestCrypt for hidden volumes.
- Employ steganography tools like OpenPuff for extra layers of concealment.
- Avoid Information Leaks:
- Regularly update hidden operating systems or containers to avoid suspicion.
- Ensure no evidence (e.g., registry entries, unused files) contradicts plausible deniability claims.
- Understand Local Laws:
- Research key disklosure requirements in your jurisdiction.
- Be cautious when traveling with encrypted devices, especially to countries with repressive laws.
Mandatory key disklosure laws and the increasing scrutiny of encrypted data highlight the importance of understanding defenses like plausible deniability. While these techniques can provide privacy and security in certain scenarios, their effectiveness depends on your threat model, ethical considerations, and local legal context.
Nesting Cryptosystems and Obfuscation: Advanced Encryption Techniques
In certain high-risk scenarios, layering multiple encryption systems and employing obfuscation techniques can significantly enhance the security of your data. While such measures may impact performance, they provide strong protection against determined adversaries. This guide explores how to layer encryption and use obfuscation creatively to safeguard sensitive information.
1. What Is Nesting Cryptosystems and Obfuscation?
- Nesting Cryptosystems: Applying multiple layers of encryption, using different tools or technologies. For example, encrypting a disk with one tool and then encrypting specific containers or files with another.
- Obfuscation: Techniques that make encrypted data harder to detect or understand. This could involve hiding encrypted volumes, using steganography, or distributing data in less obvious ways.
2. Why Use Nested Encryption and Obfuscation?
- Enhanced Security: Multiple layers of encryption make it harder for adversaries to breach all defenses.
- Defense-in-Depth: Even if one encryption layer is compromised, others remain intact.
- Plausible Deniability: Certain techniques, like hidden volumes, allow you to deny the existence of sensitive data.
- Resistance to Attacks: Protects against bootloader attacks, memory attacks, and forensic analysis.
3. Examples of Nesting and Obfuscation
3.1 Layered Disk and Volume Encryption
- Base Layer (Full-Disk Encryption):
- Use software like LUKS, Veracrypt, or BitLocker to encrypt the entire disk.
- Second Layer (Self-Encrypted Drives):
- Add a hardware-encrypted drive for an extra layer without performance loss.
- Partition or Volume Encryption:
- Encrypt specific partitions or volumes with a different tool, such as Veracrypt. Use unique passwords and key files for each layer.
- Hidden Volumes:
- Create hidden volumes within encrypted containers for plausible deniability.
3.2 Encrypting Archives and Files
- Use tools like PZIP or AES Crypt to encrypt individual files or archives.
- Store these encrypted files within other encrypted containers for added security.
3.3 Virtual Machines (VMs)
- Encrypted Virtual Machines:
- Use a hypervisor to encrypt VM files and storage.
- Nested Encryption:
- Encrypt the virtual machine’s disk, then add encrypted containers within the VM.
- Isolation:
- Use VMs to isolate sensitive environments from the host system.
3.4 Hardware Encryption
- Encrypted USB Sticks or SD Cards:
- Use devices with built-in encryption and optional self-destruction features.
- Store additional encrypted containers on these devices.
- Remote Storage:
- Store encrypted containers on remote servers, ensuring the keys are kept separate.
3.5 Steganography
- Hide encrypted files within ordinary files (e.g., images or videos) using tools like OpenPuff.
- This technique makes the encrypted data invisible to casual inspection.
4. Practical Implementation
4.1 Managing Keys
- Use unique passwords and key files for each encryption layer.
- Employ multi-factor authentication (e.g., hardware tokens) where possible.
- Keep encryption keys secure and separate from the encrypted data.
4.2 Limit Access
- Only mount encrypted volumes or open containers when needed.
- Keep sensitive data stored in encrypted volumes that remain closed unless actively in use.
4.3 Combining Techniques
- Use a combination of tools and methods to frustrate adversaries:
- Encrypt a volume with Veracrypt, store files in a steganographic container, and place it on a hardware-encrypted USB stick.
- Create multiple encrypted volumes, each with different levels of sensitivity.
5. Use Cases for Advanced Encryption
- High-Stakes Privacy: Journalists, activists, or individuals facing oppressive regimes.
- Secure Data Isolation: Businesses handling highly confidential information.
- Long-Term Data Storage: Protecting archives from future breaches.
6. Challenges and Considerations
- Performance Impact:
- Multiple encryption layers can slow down system operations.
- Self-encrypted drives mitigate this issue as they perform encryption/decryption at hardware level.
- Complexity:
- Managing multiple passwords, key files, and encryption tools requires careful organization.
- Legal Risks:
- In some jurisdictions, refusing to provide decryption keys may lead to legal penalties.
Nesting cryptosystems and employing obfuscation techniques are powerful strategies for protecting sensitive data in extreme scenarios. By layering encryption, using hidden volumes, and incorporating hardware-based or steganographic methods, you can significantly enhance your data security.
Case Studies: Real-World Scenarios with Disk Encryption
Encryption is a cornerstone of digital privacy and security, but real-world cases show that even the most robust encryption can be defeated in certain scenarios. Here, we explore two notable case studies involving encryption and the techniques used by adversaries to bypass it.
1. Case Study: Max Vision
Background
- Max Vision, a notorious hacker and carder, used DriveCrypt, a commercial encryption tool popular in the early 2000s.
- DriveCrypt was marketed as offering “military-grade” encryption with a 1,344-bit key. At the time, this was considered highly secure.
Setup
- Max encrypted:
- His associate’s laptop.
- Multiple RAID array servers stored at a safe house.
- He took additional precautions:
- Disabled Windows features like hibernation mode and system restore, which could compromise encryption.
- Used a clean disk running BSD (a secure operating system) with full-disk encryption.
- Kept sensitive evidence on separate encrypted partitions to prevent attacks like rootkits and bootloader exploits.
What Went Wrong
- Compromise of Encrypted Servers:
- The RAID servers were powered on when authorities raided his safe house. Since the decryption keys were stored in memory during the raid, they were recoverable.
- Laptop Remained Secure:
- According to court documents, the associate’s laptop was powered off, and its encryption was never broken.
Lessons Learned
- Powered-On Devices Are Vulnerable: Keys in memory can be extracted if the system is seized while running.
- Operational Security: Max’s additional precautions (e.g., disabling risky Windows features) highlight the importance of minimizing attack surfaces, even if it didn’t save him in this scenario.
2. Case Study: Maxik
Background
- Maxik, a Ukrainian hacker and carder, also used full-disk encryption to protect his data.
What Happened
- Authorities waited until Maxik was away from his laptop, then:
- Cloned the Disk: Made a copy of the encrypted data on his system.
- Installed a Bootkit: A malicious bootloader was added to his system.
- Intercepted the Master Password: When Maxik booted the laptop, the bootkit captured his decryption password in plaintext and sent it to authorities stationed nearby.
- Subsequent Breach:
- Maxik was later detained in Turkey, where he reportedly disklosed additional passwords under duress, likely involving coercive methods (e.g., “rubber hose cryptanalysis”).
Lessons Learned
- Physical Access Risks: If adversaries gain physical access to your device, they can bypass encryption by modifying the boot process.
- Coercion: Even the best encryption cannot protect against extreme physical or psychological coercion.
3. Key Takeaways from These Case Studies
3.1 Encryption Challenges
- Keys in Memory:
- If the system is powered on, encryption keys may be recoverable from RAM, rendering encryption ineffective.
- Solution: Use tools like TRESOR or Cold Boot Protection to prevent key extraction from memory during seizures.
- Bootkits and Malware:
- Malicious software installed at the bootloader level can intercept passwords or compromise encryption.
- Solution: Secure boot mechanisms, hardware-based authentication, and tamper-proof devices can mitigate such risks.
3.2 Operational Security (OpSec)
- Disable features that could compromise encrypted data (e.g., system restore, hibernation).
- Avoid leaving devices powered on and unattended.
- Store sensitive data in separate, well-encrypted containers with unique keys.
3.3 Realistic Threat Models
- Understand that encryption alone cannot defend against all adversaries:
- State-Sponsored Actors: May use advanced forensic techniques, bootkits, or physical coercion.
- Physical Access: Losing control of your device exposes it to tampering.
3.4 Ethical and Legal Context
- In some scenarios, handing over encryption keys may be legally mandated. Resistance or non-compliance could lead to severe penalties or coercive actions.
These real-world case studies illustrate the limitations of disk encryption when facing well-resourced adversaries. While encryption is a powerful tool, it must be combined with strong operational security and an understanding of the threat model to be truly effective.
Conclusion
This article provides a comprehensive guide on how to choose and implement suitable disk and file encryption technologies for Windows, Mac, and Linux. It begins by analyzing potential attack vectors against disk encryption, such as password cracking, implementation flaws, and hardware attacks, and offers corresponding countermeasures.
The article then delves into the use of various encryption tools, including BitLocker for Windows, FileVault 2 for Mac, the cross-platform VeraCrypt, and LUKS for Linux. Additionally, it explores advanced encryption concepts like mandatory key disklosure, plausible deniability, nested crypto systems, and data obfuscation techniques.
Through real-world case studies, the article highlights the importance of considering multiple factors when implementing encryption, such as the security of the operating system, the reliability of encryption tools, and the specific needs of the user. In summary, disk encryption is a crucial method for protecting data privacy, but it should be combined with other security measures and good operational practices to achieve comprehensive protection.