Table of Contents
The topic of this post is creating a test environment using VMware or VirtualBox. By using this virtual environment you can install different operating systems and software. This way, you can practice what you’ve learned, which really helps you grasp knowledge faster and remember what you’ve learned better by actually applying it.
Introduction to Setting up a Testing Environment Using Virtual Machines
let’s dive into setting up a testing environment with virtual machines. it’s super helpful to try things out hands-on. I want you to take some time to play around with the configurations and settings I discuss. Whenever I show you something that seems applicable to your situation, go ahead and give it a shot because experimenting is the best way to learn.
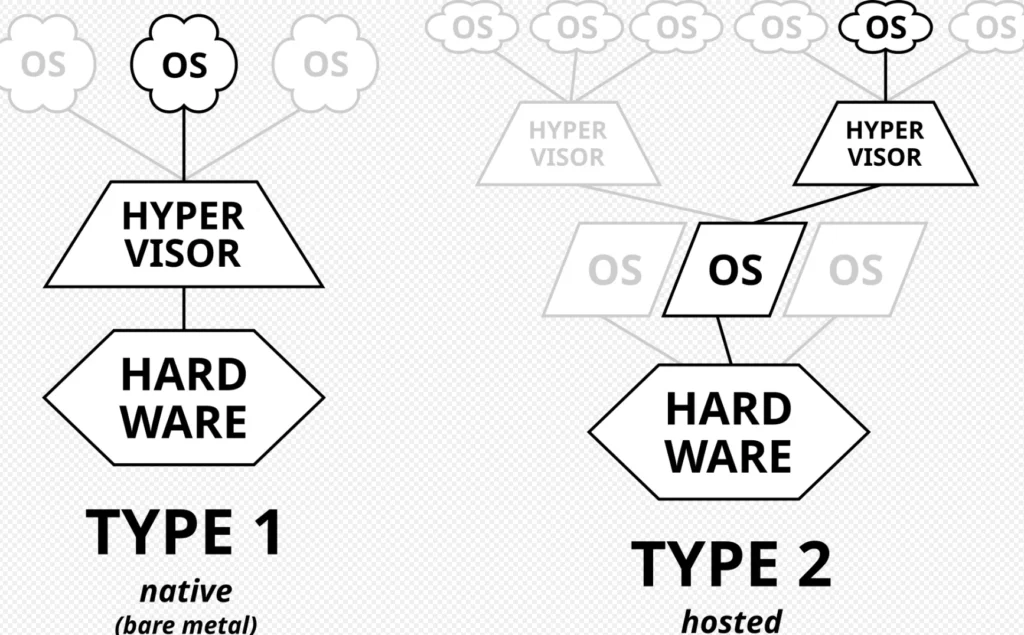
Using a virtual environment is a great way to do this without messing up your own computer. We call this software that creates virtual machines a hypervisor. Essentially, it mimics a physical computer and lets you run multiple virtual machines on one physical device.
For example, imagine your laptop is the hardware, and Windows 10 is the operating system. The hypervisor, like VirtualBox, lets you create a virtual system where you can run another operating system inside the original one, creating a “guest” environment within your “host” environment.
Now, there are different types of virtualization, but for our purposes, we’re focusing on a Type 2 hypervisor, which runs on your native operating system, whether it’s Mac, Windows, or Linux. You can use VMware or VirtualBox, which are the most popular choices. There are also others like Vagrant, Hyper-V, and VPC, but for testing, VMware and VirtualBox are my go-tos.
Now, you might wonder how to get operating systems into these virtual machines. You can do it just like you would on a physical computer—by using a CD to install the OS. You could buy the OS, get a physical CD, and do it that way. But there’s also the option of using a virtual CD, which I’ll explain soon.
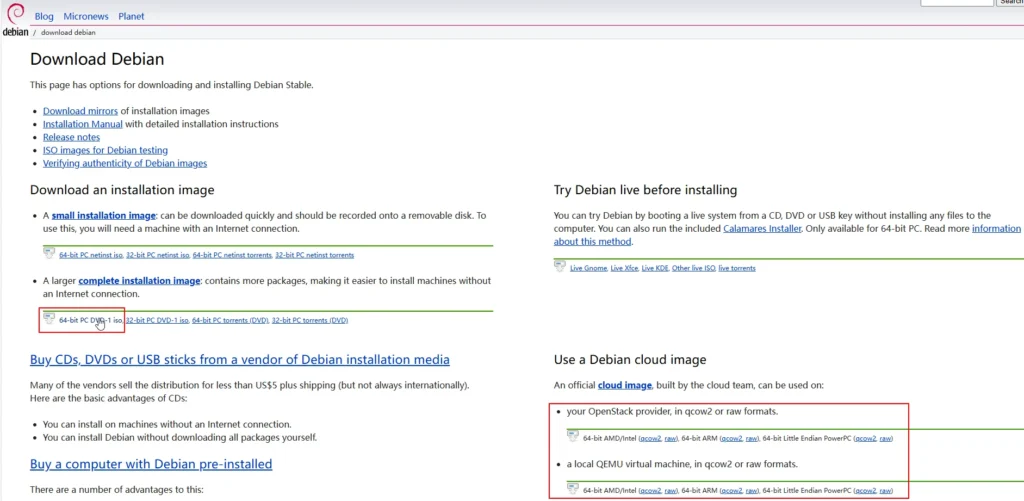
For instance, if you want to install the free Debian OS, you’d look for an ISO file, which is like a digital version of a CD. You can download the latest Debian ISO and use it in your hypervisor to install the OS in your virtual machine.
You can also find pre-made virtual disks that someone else has already set up for you. For Windows machines, there are resources where you can download test versions of OSs like XP, Vista, Windows 10, and Windows 11. Just select your platform, download the virtual image, and you’re good to go.
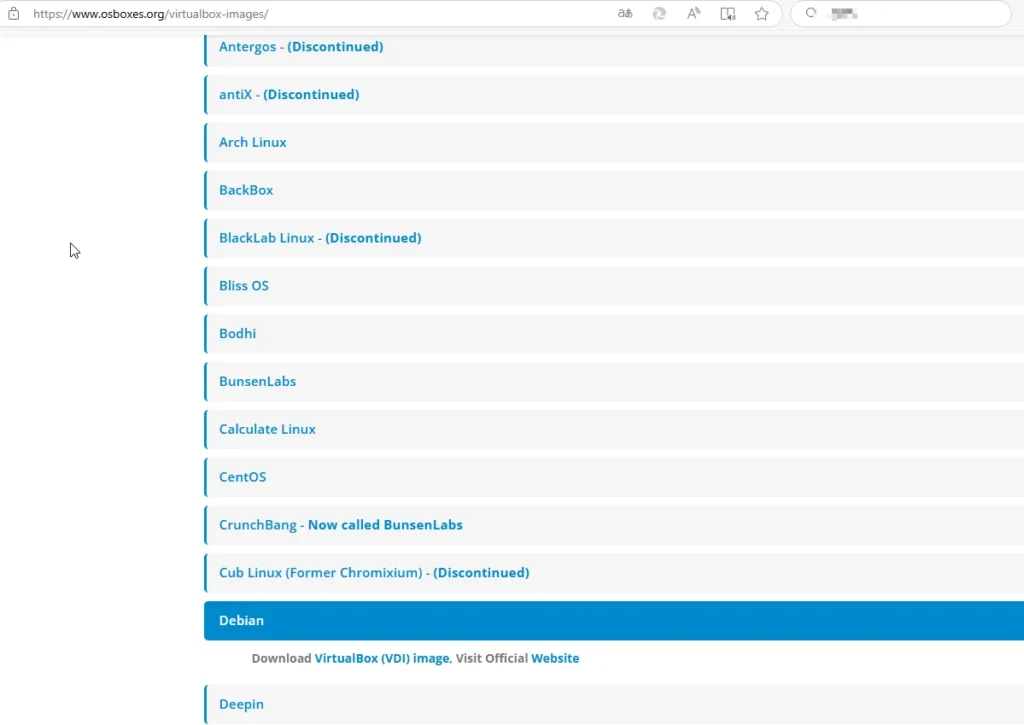
If you need Linux operating systems, websites like osboxes.org are great for getting VMware and VirtualBox images. There, you can find various Linux distros, and you can choose between 32-bit and 64-bit versions based on your system.
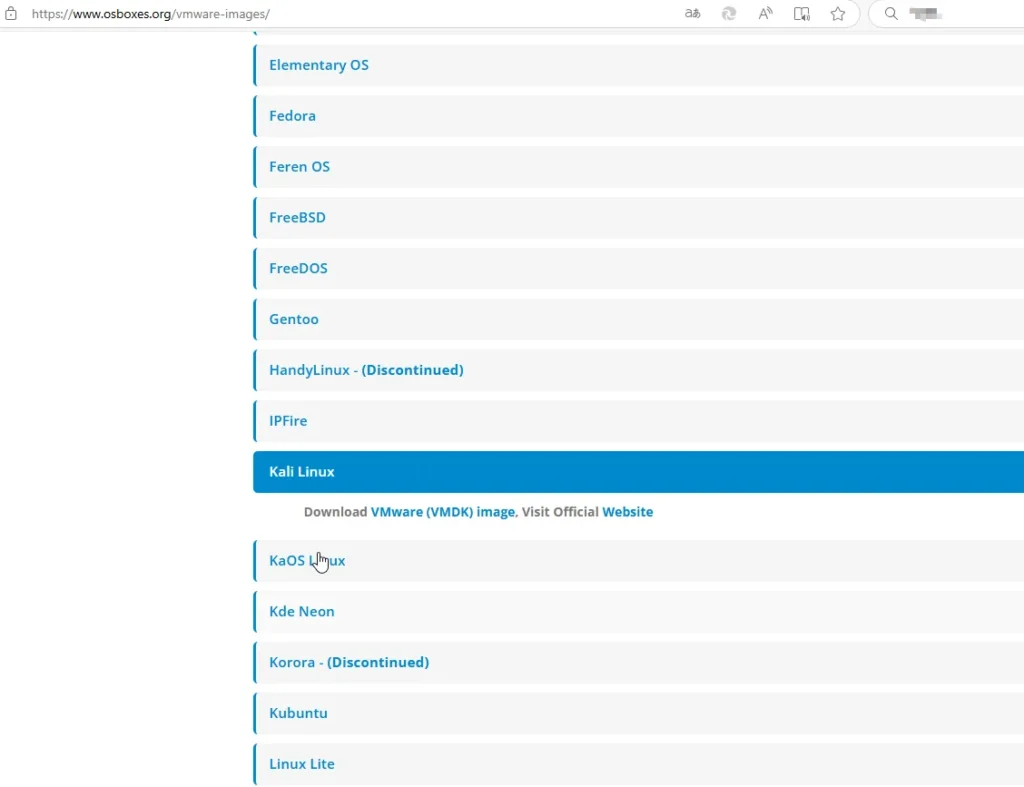
When downloading any operating system, remember the username and password for access. We’ll go over which operating systems are secure and which aren’t later. I just want to give you a basic understanding of setting up these test environments and using virtual machines for this course.
Just a heads-up, the virtual environments you download from others aren’t always trustworthy, so don’t use them for anything critical. They’re primarily for testing. Once we get into more advanced topics, we might discuss setting up actual virtual environments for security and privacy.
Vmware
The first caveat is that in the old days when VMware wasn’t acquired by Broadcom, finding a free version of VMware could be a bit of a challenge.VirtualBox and VMware both offer free versions, but VMware Workstation Player (formerly known as Player Pro) is limited to personal use only. If you do a Google search, you may have a hard time finding it because they do prefer to promote the paid version, which is VMware Workstation Pro.
To find the free version, check out the FAQ on their website, where the features of the player are explained and a download link can be found if you scroll down. The latest version is currently 12, but be sure to check the website to see if there is a newer version. You’ll find versions for Windows and Linux, but for Mac users, there’s also VMware Fusion, which requires a fee.
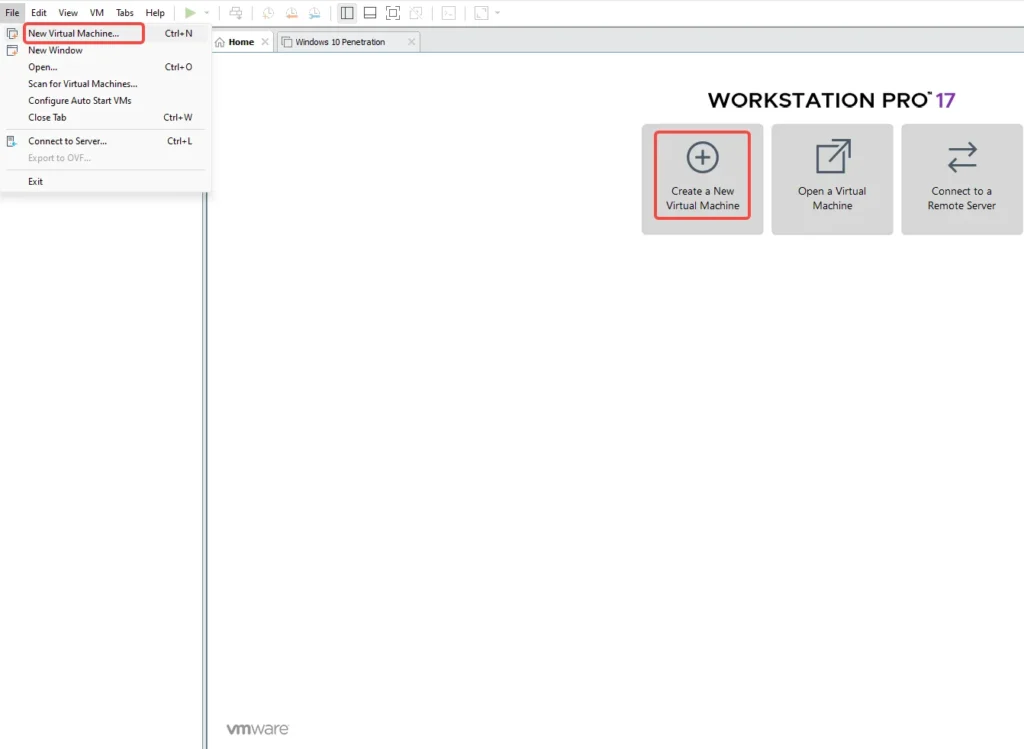
If you want to see the difference between VMware Workstation Player and Workstation Pro, check out the comparison link.Player has fewer features, which isn’t really a big deal for testing, but may have security and privacy implications, which we’ll talk about later.
Once you’ve downloaded VMware Player, the installation process is fairly simple. Click Next to accept the terms and add the enhanced keyboard driver. You can choose to skip some of the options, but it’s important to keep it up to date if you plan on using it for security isolation.
Once installed, you can start using VMware Player. If you’ve installed a virtual machine before (like Windows 10), you can easily access it. To add a new virtual machine, you may use an OVF file. Importing them directly may take some time depending on the speed of your computer. When you’re ready, click “Play” to start the operating system.
Right click on the virtual machine and select “Settings”, you will see various virtual devices. If no network adapter is detected, you’ll need to add it manually. This is critical for subsequent analysis of network traffic using Wireshark. You need to set it to bridge mode so that it can connect directly to the physical network.
Once the operating system is running, you may see VMware Tools installed, which are required drivers that make sure things like the display and USB are functioning properly. If they are out of date, you will need to update them by going to Manage > Update VMware Tools.
One limitation of VMware Workstation Player is the lack of a snapshot feature. Snapshots save the current state of a virtual machine, making it easy to recover if something goes wrong, and VirtualBox has this feature, so it’s worth trying both to see which you prefer. If you’re serious about virtualization, you might also consider upgrading to the Pro version of VMware for more features.
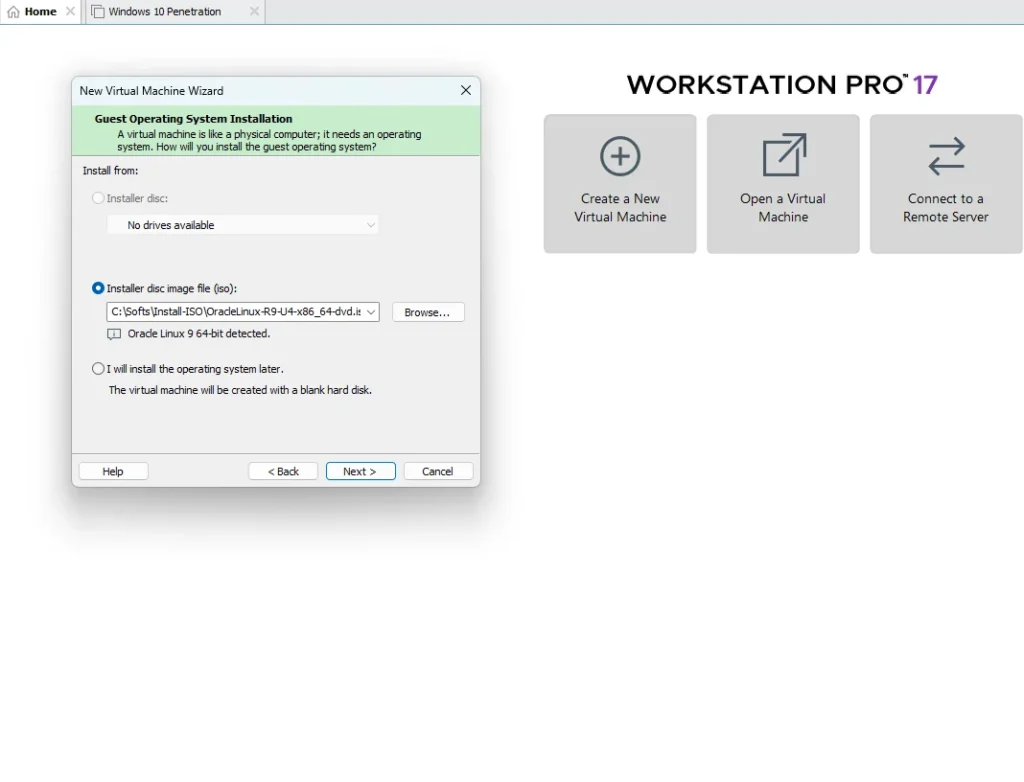
To install an operating system via a CD or ISO image, you’ll need to have that image ready. For example, you can download the ISO image from the Debian website. Then, create a new virtual machine in VMware and either insert the physical CD or choose the ISO image.
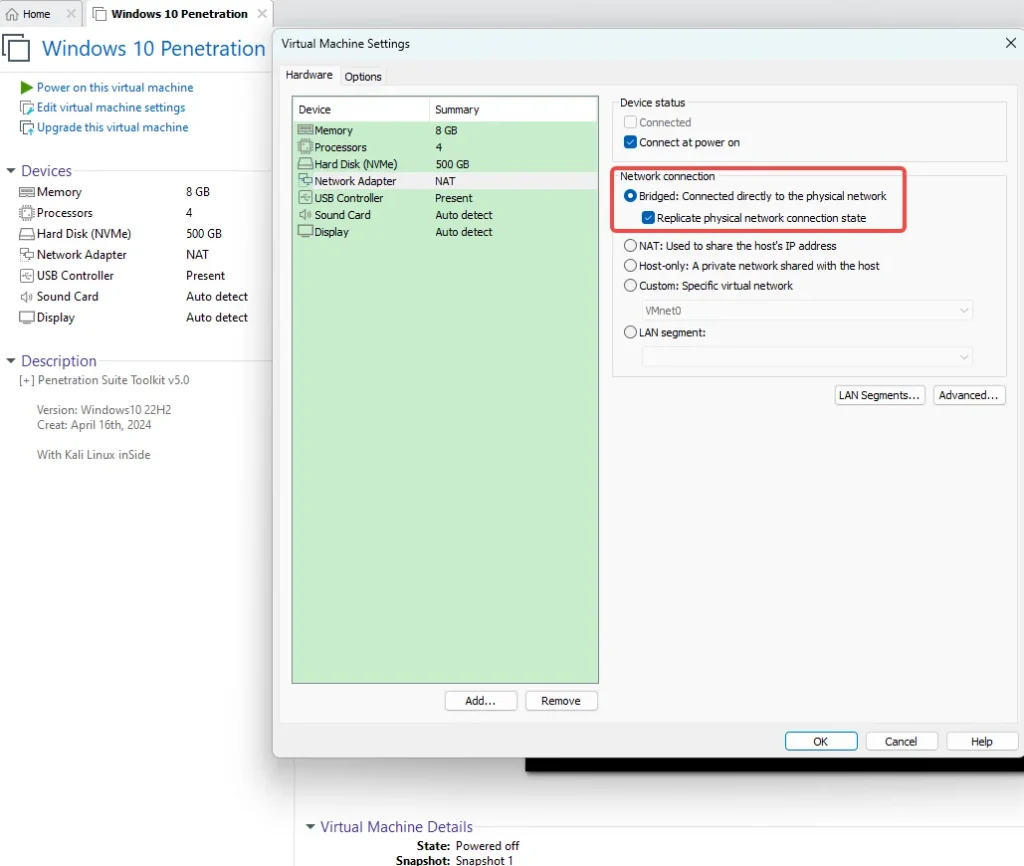
You can customize the settings here; make sure to set the network to bridged mode. After that, simply follow the usual steps to install the operating system. This is why having a virtual image is very useful when testing – you can skip the long installation process!
The above is the problem encountered when VMware was not acquired by Broadcom, but now that VMware has been acquired by Broadcom, their policy has changed and VMware Workstation Pro is available for free for individual users.
Virtual box
let’s talk about VirtualBox now. The cool part is that VirtualBox is free, and while most of it is open source, not everything is. You can check out the downloads page here, which supports Windows, Mac OS X, Linux, and even Solaris.
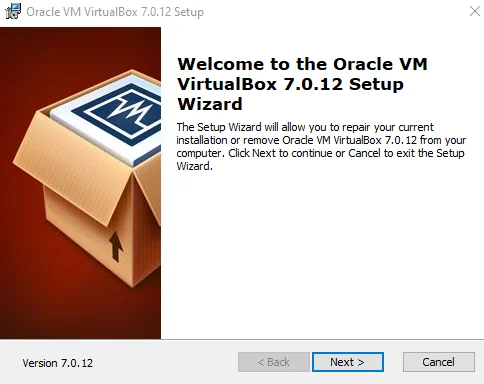
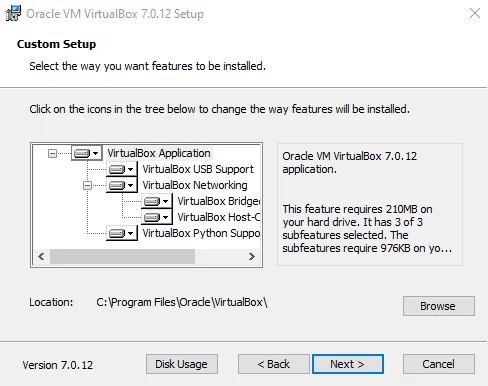
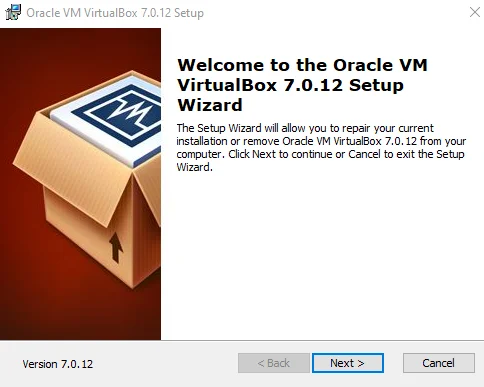
To get started, we’ll download the Windows version. Click on the link, and it’ll download the executable. Don’t forget to get the extra download for all supported platforms, which includes features like USB 3 support, VirtualBox RDP, and disk image encryption. Those extras are not fully open source but come packaged together.
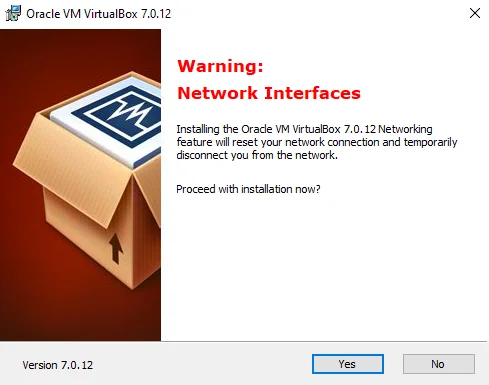
Once you’ve downloaded it, double-click the installer to run it. The installation process is pretty standard. Just follow through the prompts. Since we’re setting this up as a test environment, it’s fine to select all the options. Just a heads-up, your network card may disconnect and reconnect during the installation.
Now, after installation, you can go to OSBoxes to download a pre-configured virtual machine in DVI format. To set it up, click on “New,” choose the right operating system (like Linux), and then select an existing virtual disk to use. The system will boot like any other OS.
If you’ve downloaded an OVA or OVF file, you can import it by going to “File” > “Import Application.” This will allow you to browse for the downloaded file and adjust any network settings as needed. Importing might take a bit of time depending on your machine’s speed, but once it’s done, you’ll see it running.
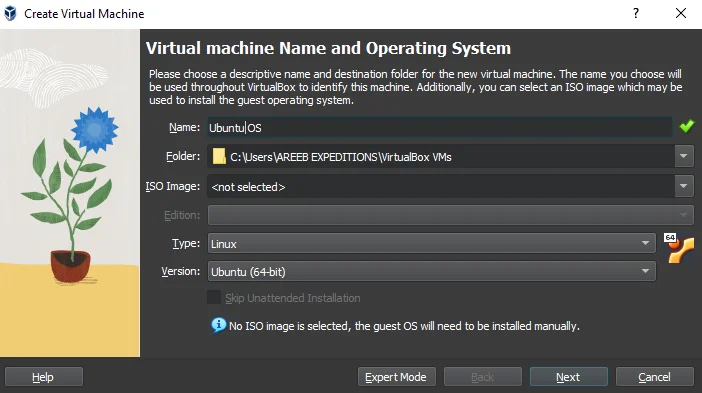
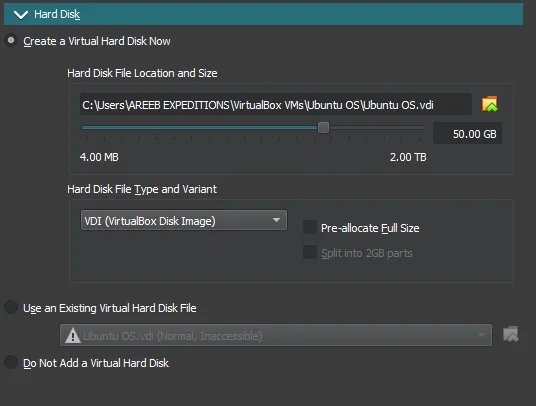
Now, to set up a new virtual machine from an ISO or disk, click “New” first. For instance, if you’re setting up Debian 32-bit, select that and create a virtual disk. Using VDI for the disk format is fine, and dynamically allocating space is better since it saves disk space.
You’ll need to make sure to mount the ISO file or use a physical disk. Go to “Settings” > “Storage” to check if you have an empty disk slot. If you already have a physical disk in your drive, select it, or choose the ISO file you downloaded. Click “OK,” and then start the machine to begin the installation process as you would with any OS.
One great aspect of VirtualBox is the Guest Additions, which enhance functionality by enabling features like clipboard sharing between the host and guest OS. To install this, go to the VM’s settings, select an empty disk slot, and navigate to find the VBoxGuestAdditions.iso file included with your VirtualBox installation.
Finally, you’ll want to install the VirtualBox Extension Pack for full functionality, including support for USB 2 and 3, RDP, and disk encryption. Go to “File” > “Preferences” > “Extensions,” and select the extension pack you downloaded. Follow the prompts to install.
One awesome feature of VirtualBox is the snapshot capability, which VMware Workstation Player lacks (though the Pro version has it). Snapshots allow you to take a static version of the current state of the virtual machine. You can easily revert back to that version later or create multiple snapshots to test different configurations.
Kali Linux 2024
Kali Linux was previously known as BackTrack and is a Debian-based distribution. You can see it shares a look with Debian because it operates within that familiar environment.
Kali comes packed with a ton of security, privacy, and forensic tools—seriously, there are a lot! It also offers timely security updates, which is definitely a plus. It supports ARM architecture and provides a choice of popular desktop environments. You’ve got Gnome as the default here, but there’s also KDE, XFCE, MATE, E17, LXDE, and more. Plus, they’ve made it easy to upgrade to the latest versions seamlessly.
However, keep in mind that Kali Linux isn’t meant for everyday use; it’s specifically designed for security and privacy tasks. In this sequence of topics, I’ll show you how to use it to monitor for suspicious traffic like trojans, RATs, or applications sending out data, and even how your browser can be hacked.
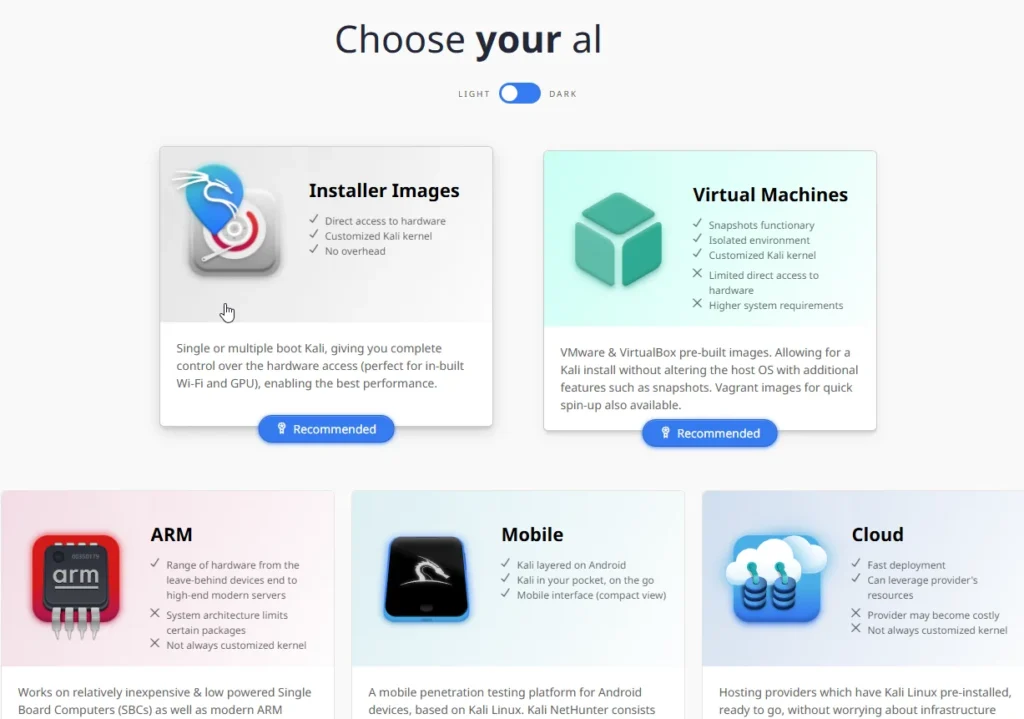
You can download Kali Linux from their official site here. I’d recommend downloading the ISO version of Kali, but it involves mounting the ISO and going through the installation process, which can take some time. A quicker option is to get a pre-built virtual image from Offensive Security, where you can find versions for VMware and VirtualBox, or even a torrent version. Since we’re using this for testing, these prebuilt images are perfect.
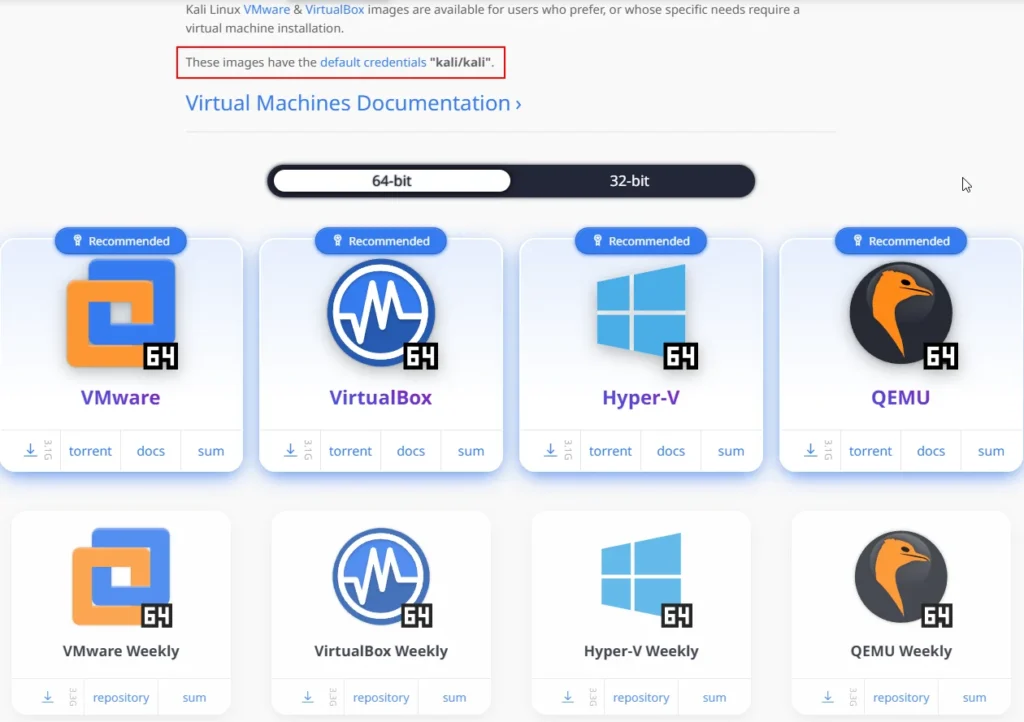
Just a heads-up: the default username is “kali” and the password is “kali”.
You can also find Kali Linux on osboxes.org, but keep in mind that it’s not as official as the version from Offensive Security, the creators of Kali. However, it does offer alternatives for VMware and VirtualBox versions.
Conclusion
Setting up a testing environment with virtual machines is super useful for experimenting without risking your main computer. You can use VMware or VirtualBox to create these virtual setups. VMware offers both free and paid versions, but for detailed features, the Pro version might be better. VirtualBox is free and has handy features like snapshots.
For security testing, try Kali Linux, a specialized OS with tons of tools. You can download it as an ISO or use pre-built virtual images for quick setup. Make sure to use these environments for testing only, as downloaded VMs might not always be safe.

